| For 3CX version 16 setup information please click here |
| For 3CX version 15 setup information please click here |
| For 3CX version 12.5 setup information please click here |
| For 3CX version 12 setup information please click here |
For the older version please click here
|
| GENERAL INFORMATION |
 |
3CX is a software based PBX that offers a vast assortment of customizable options and settings. This setup guide is intended to show the most basic configuration of the 3CX Phone System version 20. For more advanced configurations and features, you can combine the basics detailed in this guide along with the 3CX documentation.
Please note, Callcentric is not responsible for preventing unwanted physical or remote access your IP PBX. If your IP PBX is compromised, you will be responsible for all associated damages/losses.
Please be sure to read this guide regarding securing your IP PBX solution.
|
|
| RESOURCES |
|
Website:
3CX Homepage
Help / Support
3CX Forums
3CX Support Page
|
|
| Configuring 3CX |
|
Here we will configure the 3CX IP PBX through the web interface to properly route both incoming and outgoing calls to/from Callcentric. The information presented in this guide is based on Version 20 Update 2 (Build 715) of the 3CX Software, running on a Debian 12 installation. Please note, if you are running a different software version (or a different software edition), some of the menu options and settings may be different. This guide assumes that you have installed the 3CX IP PBX and also that you have administrative access to the 3CX Administration Web Interface.
We recommend that you read each step through in its entirety before performing the action(s) indicated within the step.
|
 | |
| STEP 1 |
Adding an extension |
|
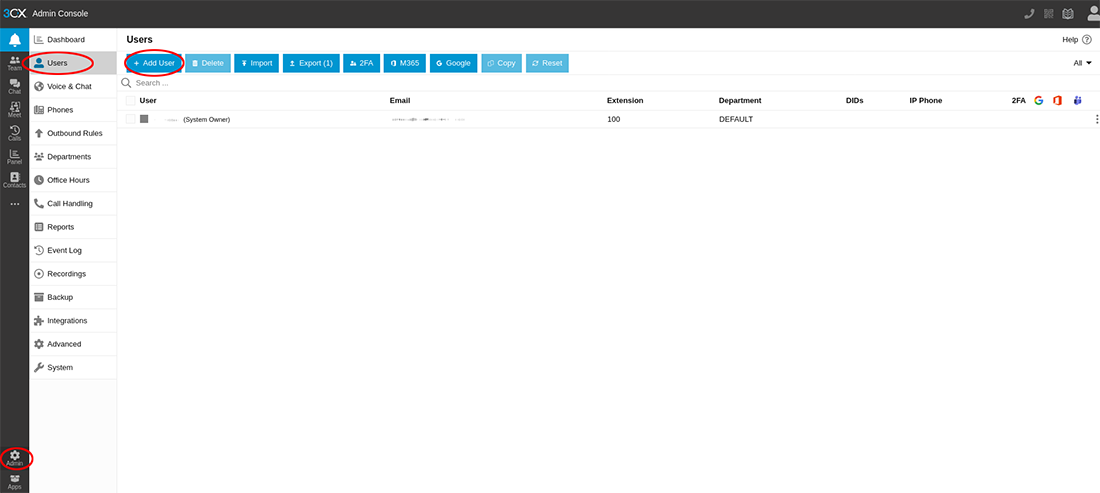
Log into the 3CX Administrative interface from an account that has "administrative privileges". In the main interface, click on the Admin icon located near the bottom left corner of the page and then select Users. From there, click on the Add Users button.
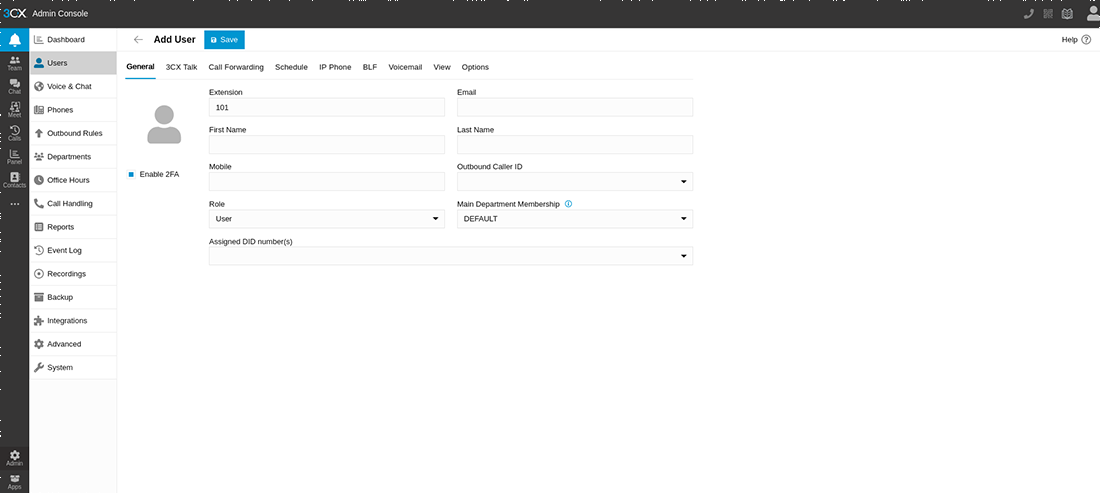
From the Add Users page, enter your Extension Number and Name. Once you have entered your credentials for this extension, please click on the Save button to continue.
|
| STEP 2 |
Adding a SIP Trunk using the Callcentric template |
|
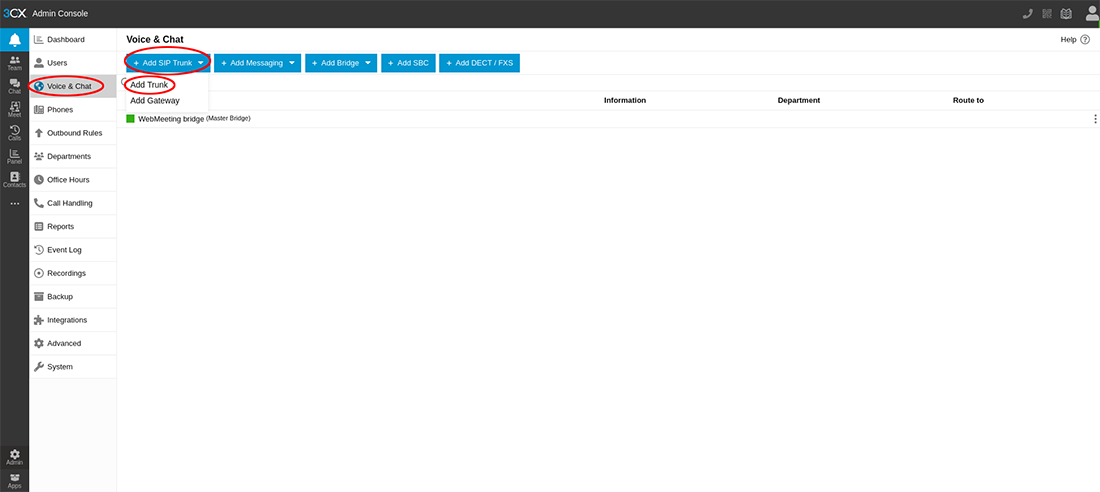
Next, click on Voice & Chat from the left side of the page. Click the Add SIP Trunk button and then select Add Trunk from the drop down menu.
Once the page loads, enter the following settings into the appropriate fields:
| Name | Callcentric |
| Country | US |
| Provider | CallCentric |
| Main Trunk Number | This is either the default extension 1777MYCCID OR 1777MYCCIDEXT, where 1777MYCCID is the 1777 number assigned to you by Callcentric and EXT is the three digit extension you are trying to register this UA to.
For example: 17770001234101 would register to extension 101 on account 17770001234.
You cannot register to your account usingonly the extension number. |
| Authentication Password | Enter your extension SIP Password here. Your extension SIP Password is the password you created for the extension you are trying to use. You may edit the SIP Password you wish to use in by logging into your Callcentric account and clicking on the Extension menu link and then modifying the appropriate extension. |
| Authentication ID (SIP User ID) | This is either the default extension 1777MYCCID OR 1777MYCCIDEXT, where 1777MYCCID is the 1777 number assigned to you by Callcentric and EXT is the three digit extension you are trying to register this UA to.
For example: 17770001234101 would register to extension 101 on account 17770001234.
You cannot register to your account usingonly the extension number. |
| Registrar/Server | This option should automatically be populated with sip.callcentric.net; however if it isn’t, specify it here. |
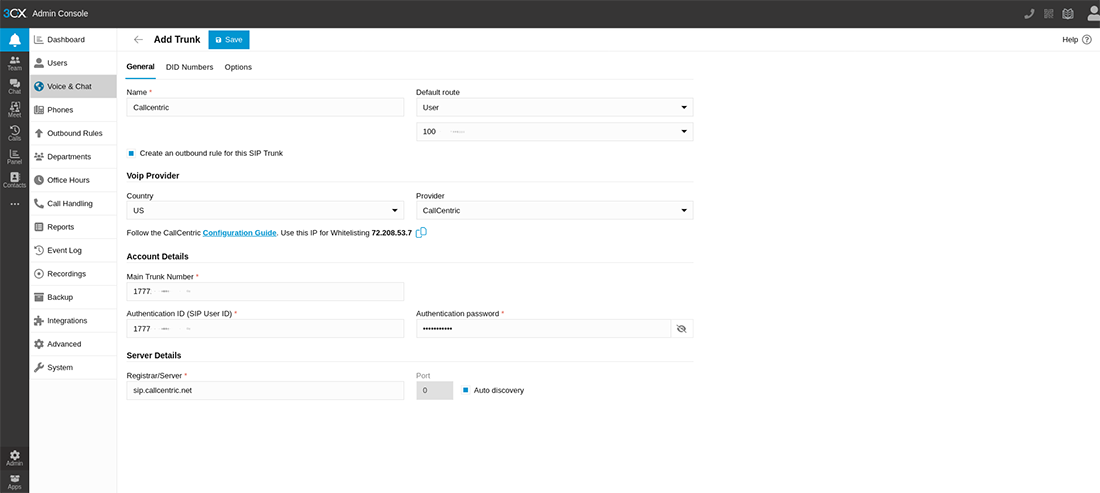
Once completed, please click the Save button to continue.
|
| STEP 3 |
Adding an Outbound Rule |
|
After saving your trunk configurations, the interface should automatically redirect to the Outbound Route Configuration page. If it does not, click on the Outbound Rules button on the side menu bar.
Next, you will be prompted to configure an Outbound Rule for VoIP Provider.
For our example, we've set our outbound rule name as Outbound rule for Callcentric; in addition we're using 9 as a qualifier. By configuring 9 as the qualifier, you will need to dial 9 prior to every number dialed in order to send calls via Callcentric. To configure your PBX in this manner, please use the following settings:
| Enter name for Trunk | Callcentric |
| Calls to numbers starting with prefix | 9 |
| Calls from extension(s) | this setting should remain blank/unpopulated |
| Calls to numbers witha length of | this setting should remain blank/unpopulated |
On the Make outbound calls on section of your Outbound Routes page, please specify the following for Route 0:
| Route 0 | Callcentric |
| Strip digits | 1 |
| Prepend | this setting should remain blank/unpopulated |
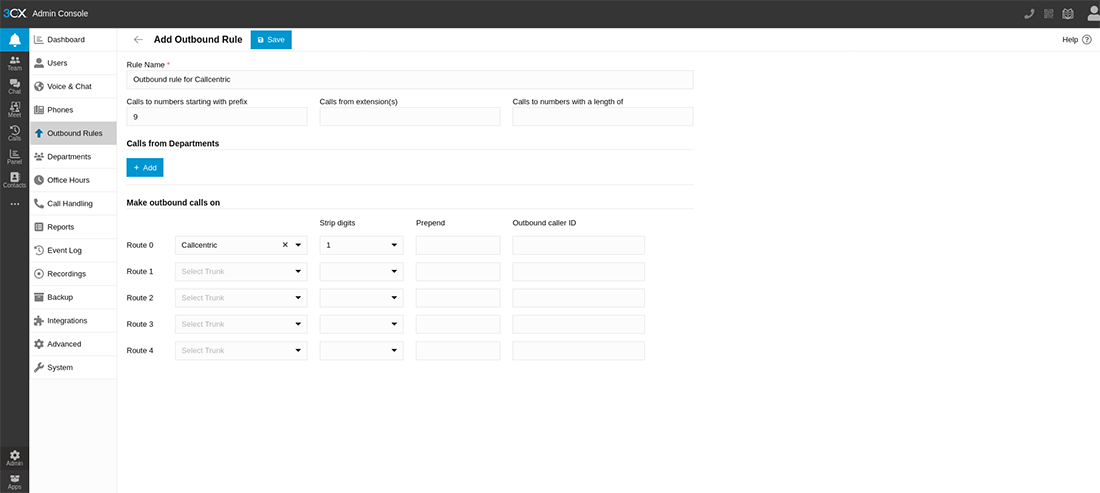
Once completed, please click the Save button to continue.
|
| STEP 4 |
Adding an inbound rule |
|
If you have phone numbers with us, you can add those phone numbers by visiting the DID Numbers section located within the SIP Trunk Configuration page. From this page click on the Add button and specify the DIDs that you’ve acquired from us.
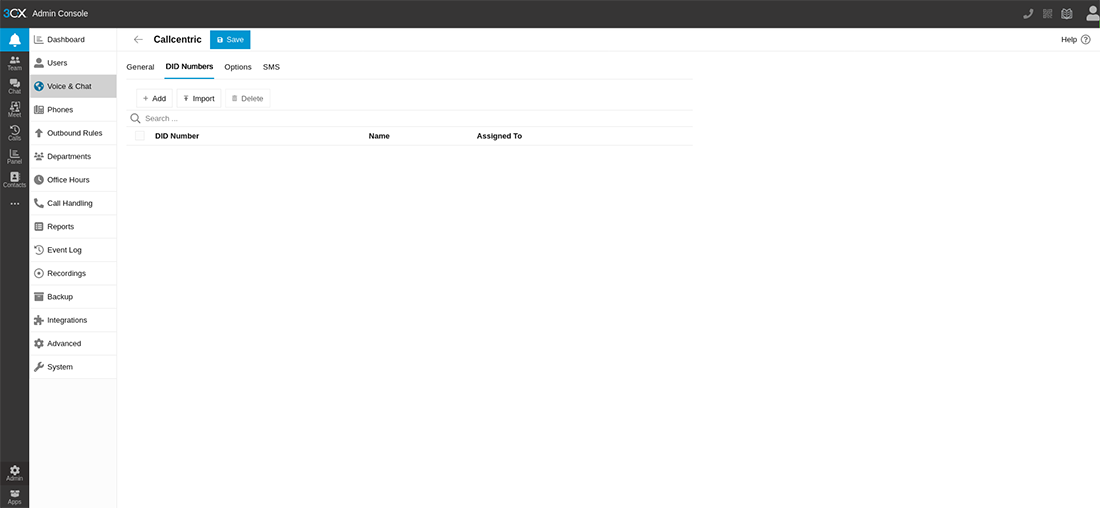
After you've added your DIDs to your trunk settings, select Call Handling from the side menu bar.
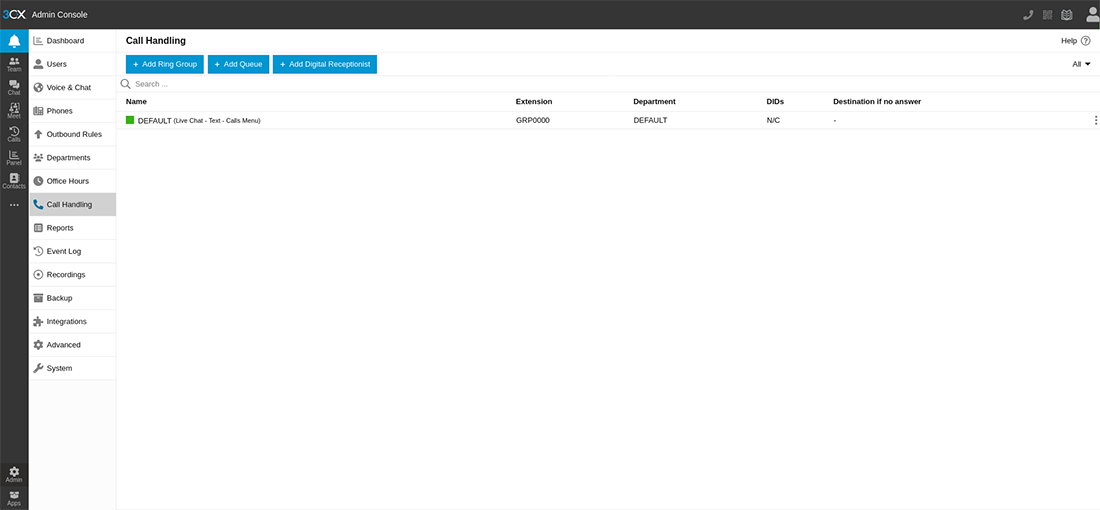
In our example, we will be routing all inbound calls through our main number towards a Ring Group. To do so, click on the Add Ring Group button on the top menu bar. In the General section on the Add Ring Group page, click the Assigned DID Number(s) option to select the specific numbers you want to include in the ring group. After you've chosen the numbers you'd like to include, select the Ring Group Name option and enter a name for the Ring Group you just created.

Next, go to the Users tab and add the Extension that you created in Step 1 of this guide.
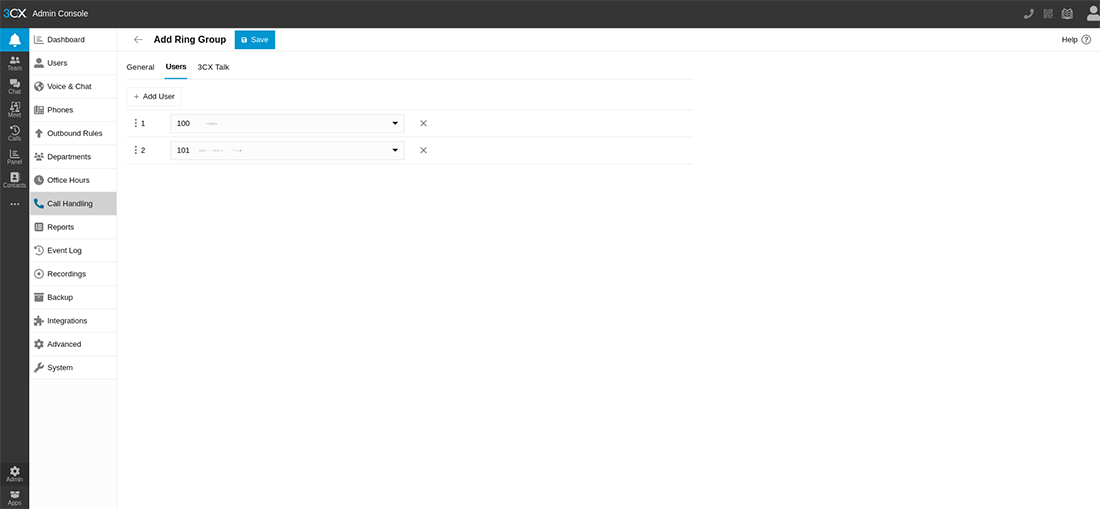
Once completed, please click Save button to apply your changes.
|
| STEP 5 |
Line Status |
|
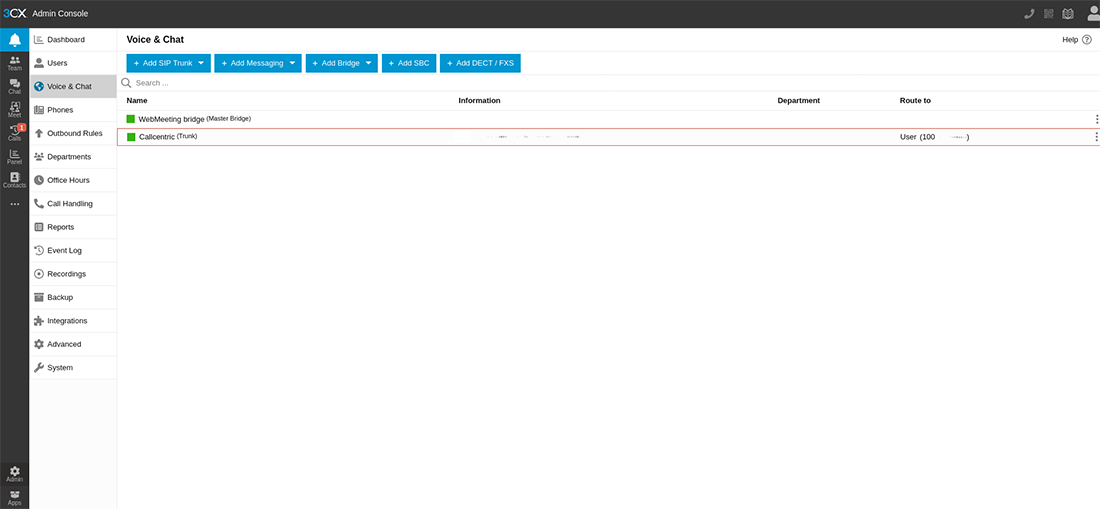
Once you have successfully configured your 3CX phone system, you can click on Voice & Chat from the side menu bar to see if your PBX is properly registered.
If your 3CX System has properly registered to our servers, you should see a solid green square next to the trunk that you've configured. If there are problems with the Registration of your system, please review the logs to see the exact reason why your 3CX System is not properly registering to our servers.
|
| STEP 6 |
Configure and test UA (User Agent) |
|
- Choose your desired UA
- Use the IP address or hostname for your 3CX phone system along with "100" (the extension created earlier which is the username) and the password for the 100 extension to connect to your 3CX phone system
If you need further assistance registering a UA towards your newly created extension or are having issues registering your UA on your 3CX phone system, please refer to 3CX’s Administration manual here.
|
| STEP 7 |
That's it! You can now make a phone call |
|
You can make test calls to 17771234567 (as you've specified 9 as your qualifier, please dial 917771234567), or if you are signed up for one of Callcentric's rate plans you can place a call to a traditional landline or mobile phone by dialing either:
1 + the area code and number for calls to the US
Or
011 + the country code, area code, and number for calls worldwide (you may also use 00 instead of 011).
|
|
|
