| For ZoIPer 3.2 setup information please click here |
| For the older version please click here |
|
| GENERAL INFORMATION |
 |
|
Zoiper is a multi-platform softphone, available in both free and paid versions; that is available for Windows, Linux, and MacOS. Zoiper is easy to configure, supports many useful features, and has proven to be a stable solution on all three of the platforms we tested on.
|
|
| RESOURCES |
|
Websites:
Zoiper Homepage
Download Zoiper
Help / Support:
Zoiper Support
|
|
| Configuring Zoiper 5 |
|
These instructions are based on Zoiper V5 and will walk you through a basic configuration so that you can use your Zoiper installation to place and receive calls via your Callcentric account.
This setup guide assumes you have properly installed the application on your operating system of choice and have addressed/resolved any potential audio issues before attempting to configure Zoiper for use with Callcentric.
|
 | |
| STEP 1 |
Upon launching the application, you will be prompted to specify a username/login, as well as a password. In these fields, please specify the following:
|
| Username/Login | This is either the default extension 1777MYCCID OR 1777MYCCIDEXT, where 1777MYCCID is the 1777 number assigned to you by Callcentric and EXT is the three digit extension you are trying to register this UA to.
For example: 17770001234101 would register to extension 101 on account 17770001234.
You cannot register to your account using only the extension number. |
| Password | Enter your extension SIP Password here. Your extension SIP password is the password you created for the extension you are trying to use. You may edit the SIP password you wish to use in by logging into your My Callcentric account and clicking on the Extension menu link and then modifying the appropriate extension. |
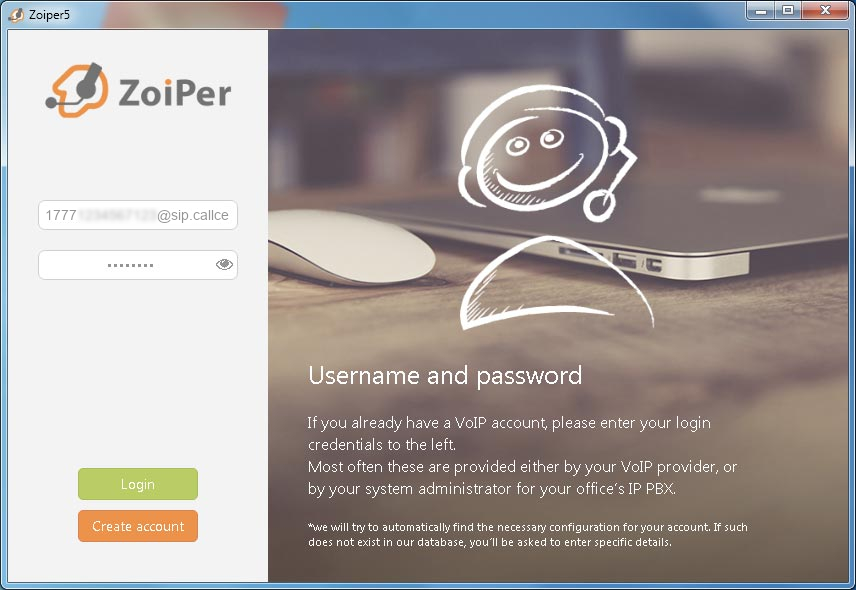
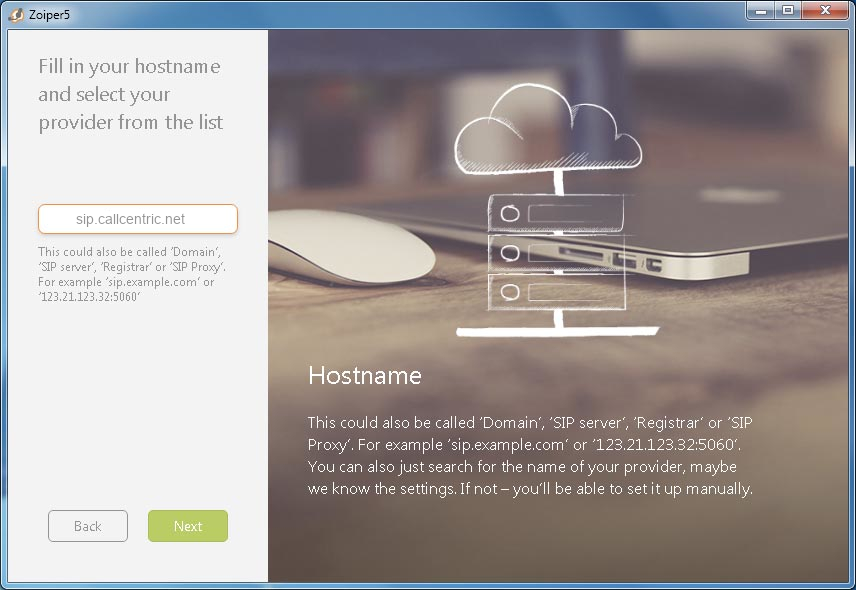
Click on the Login button to continue. Next, you will be prompted to specify a hostname. In the hostname field, please enter sip.callcentric.net and then click the Next button to continue.
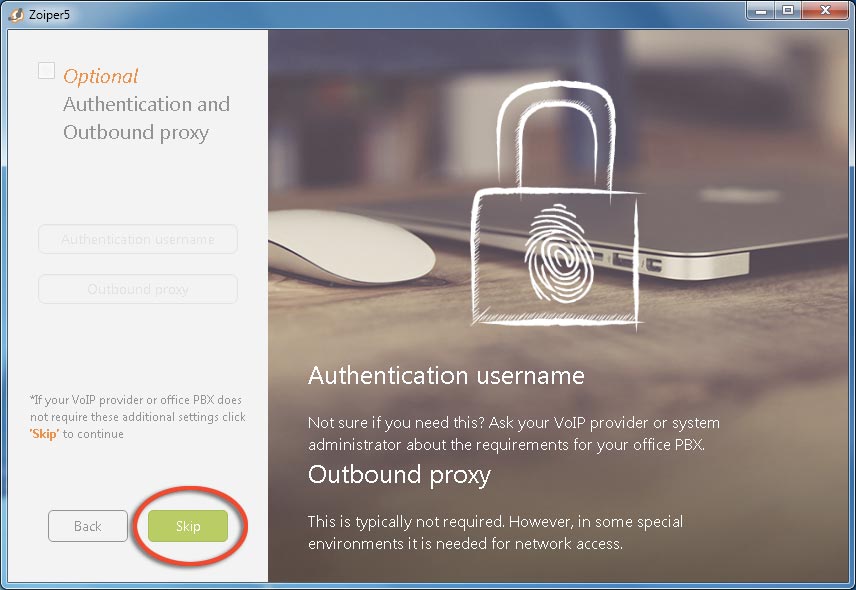
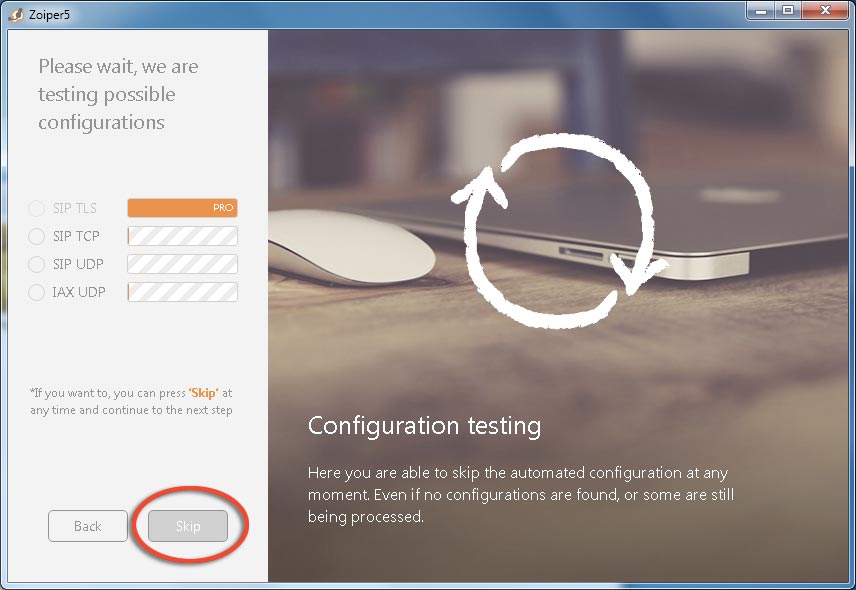
In the next 2 prompts, you will be given the option to specify an authentication/outbound proxy, as well as to configure testing. You can ignore/bypass these prompts by clicking the Skip button, as indicated by the screenshots below:
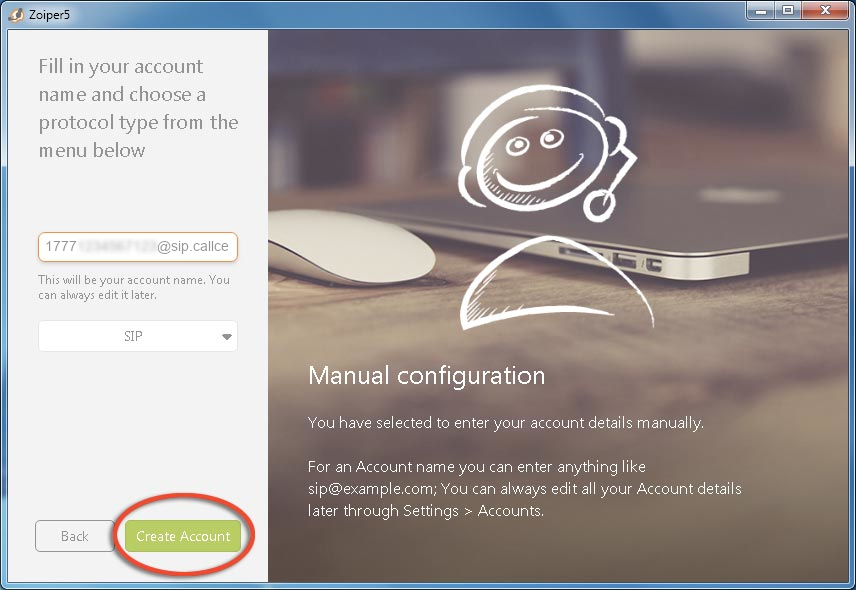
Next, you will be prompted to specify the protocol that you would like to use. From the drop down menu, select SIP, as indicated in the screenshot below. After doing so, click on the Create Account button:
|
| STEP 2 |
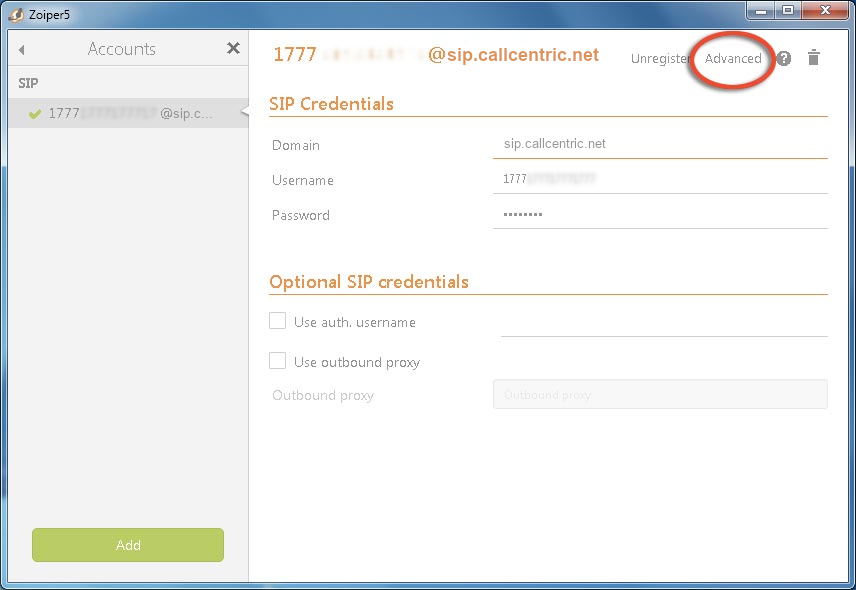
In the Accounts section on the left-hand side menu, select the account that you've just created and then click on the Advanced link on the top right hand side of the softphone, as indicated by the screenshot below:
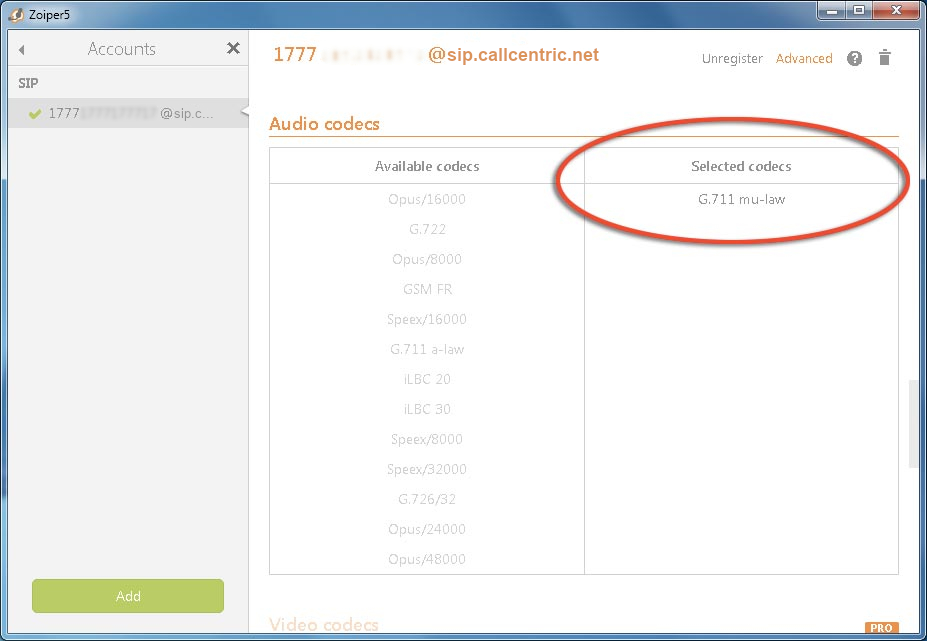
Next, locate the section labeled Audio Codecs and disable all codecs under the Selected Codecs listing except for the G.711 mu-law codec as noted in the screenshot below:
Finally, on the left hand side of the softphone, click on the X button and follow the prompt(s) to save/apply your settings.
|
| STEP 3 |
To confirm that your softphone has properly registered with our Callcentric Servers, look for a Green Checkmark at the top of the main interface.
| | STEP 4 |
That's it! You can now make a phone call.
You can make a test call to 17771234567, or if you are signed up for one of Callcentric's rate plans you can place a call to a traditional landline or mobile phone by dialing either:
1 + the area code and number for calls to the US
Or
011 + the country code, area code, and number for calls worldwide (you may also use 00 instead of 011).
|
|
|
