 | |
| STEP 1a |
|
|
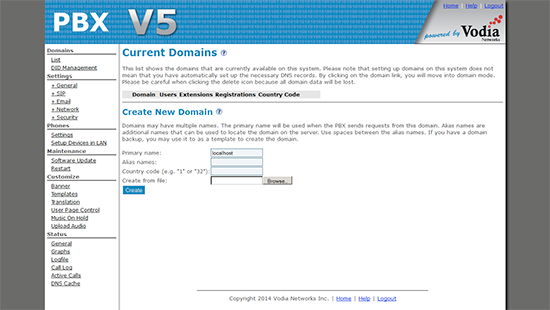
If you do not have a "Domain" configured, you will need to add one by proceeding with the instructions below. Otherwise, if you already have a "Domain" configured then you may skip this step.
Login to the Vodia PBX administrative interface
Select List from the top of page
Click on the Create button from the Current Domains page
Read the instructions for adding a new domain
Enter localhost in the Primary Name field
Click Create to create a new domain
|
| STEP 1b |
|
|
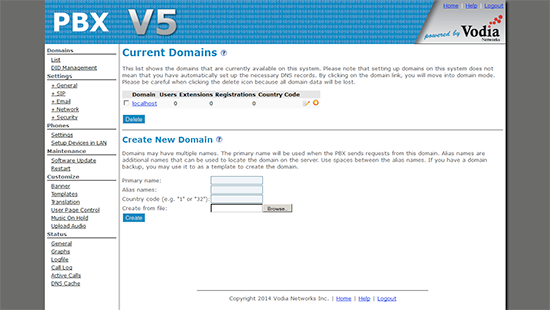
**If you already have a domain configured then please select it
You will need to select the domain you wish to configure. Note that your users count may differ from the number shown below.
Click List from the top of the page
Select the domain you wish to edit. In this case please select localhost from the Domains list
|
| STEP 2 |
Trunk Configuration: Basic |
|
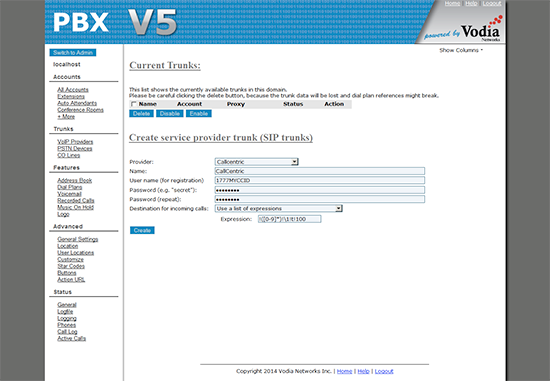
A trunk is used to route calls to/from your Vodia PBX and Callcentric. Here we will configure a Callcentric Trunk on your Vodia PBX.
Select VoIP Providers from the navigation options. You will either be shown a list of trunks you have already configured or an empty list of trunks
From the drop-down menu for the option Providers, select Callcentric
Enter the following information in the appropriate fields:
| Name | Callcentric |
| User name (for registration) | This is either the default extension 1777MYCCID OR 1777MYCCIDEXT, where 1777MYCCID is the 1777 number assigned to you by Callcentric and EXT is the three digit extension you are trying to register this UA to.
For example: 17770001234101 would register to extension 101 on account 17770001234.
You cannot register to your account using only the extension number. |
| Password (e.g. "secret") | Enter your extension SIP Password here. Your extension SIP password is the password you created for the extension you are trying to use. You may edit the SIP password you wish to use in by logging into your My Callcentric account and clicking on the Extension menu link and then modifying the appropriate extension. |
| Destination for incoming calls | Use a list of expressions |
| Expression: | !([0-9]*)!\1!t!100 |
|
| STEP 3 |
Trunk Configuration: Advanced |
|
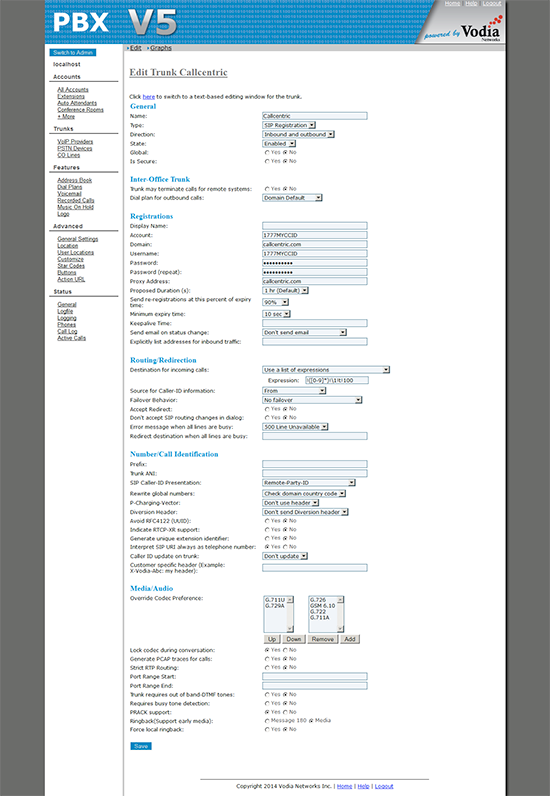
After specifying the settings above, you should be redirected back to the Current Trunks page. On this page click on your newly created Callcentric Trunk, as you will need to make additional changes to your trunk.
Enter the following information in the appropriate fields:
| Proxy Address | sip.callcentric.net |
| Source for Caller-ID information | From |
| SIP Caller-ID Presentation | Remote-Party-ID |
| Rewrite global numbers | Check domain country code |
| Media/Audio | 1.) G.711U
2.) G.729A |
Your configuration should look similar to the one shown in the picture below:
|
| STEP 4 |
Configuring Dial Plans |
|
Here we will add a default dial plan for the localhost domain (if there is no default dial plan).
Note: Currently in order to send star (*)/feature code numbers to Callcentric you will have to use an outside line qualifier. Here we use "9". We also use "9" to send any call to Callcentric:
Select Dial Plans from the navigation menu
Add a new dial plan and call it "callcentric"
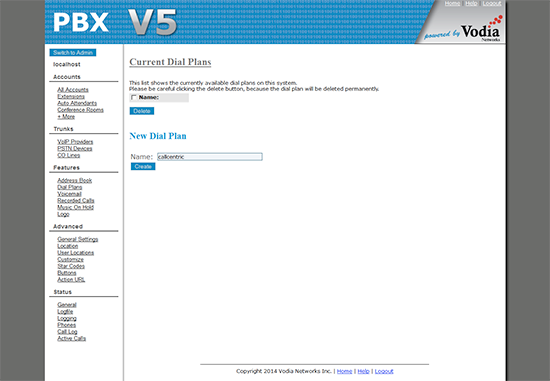
Click Create. The page will then reload
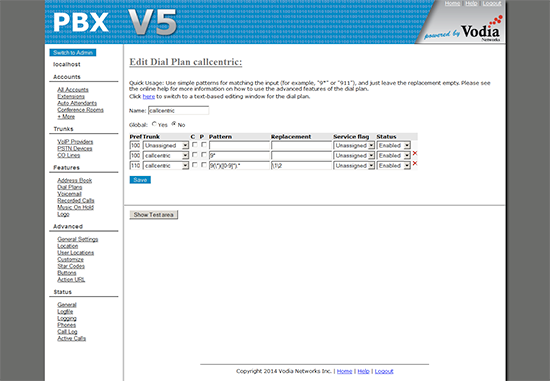
After the page reloads, click on the newly added dial plan to edit
Enter the following dial plan
| Pref | Trunk | Pattern | Replacement |
| 100 | callcentric | 9* | |
| 110 | callcentric | 9(\*)([0-9]*).* | \1\2 |
|
| STEP 5 |
Add an Account/Extension for calling |
|
An extension in Vodia PBX is an account that provides a number which another UA (software or hardware used for calling) can connect to in order to make and receive calls.
*If you have already configured an extension then you may skip to editing the extension. Then in the next step (Inbound Call configuration) you may use your existing extension.
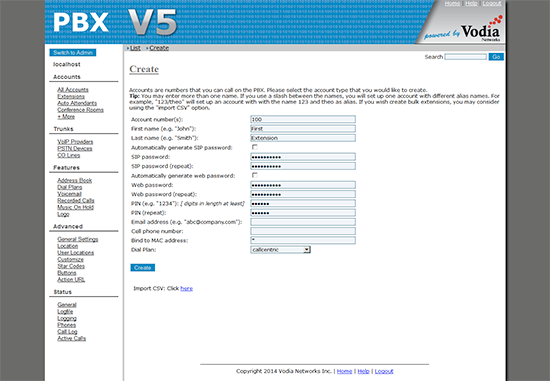
Select Extension from the navigation menu
To add a new extension click on the Create button to new extension which will connect to your Vodia PBX server
From the drop-down menu (for the option Dial Plan) select callcentric.
Enter 100 for the first extension number
Enter First Extension in the Name field. Later you may enter a unique identifier of your choice
Enter an optional email address in the Email field for the person using this extension. Here we have left it blank
When the page reloads select Extensions from the navigation
Click on the link next to the 100 extension, or your existing extension
Set the Dial Plan option to "callcentric", which is the dial plan we created earlier.
Enter your desired password in the SIP Password field. You will use this password when configuring your desired UA later in order to connect to your Vodia PBX
Click Save to save your changes
|
| STEP 6 |
Configure and test UA |
|
Use the IP address or hostname for your Vodia PBX system along with 100 (the extension created earlier) as the username and the password for extension 100 to register to your PBX.
|
| STEP 7 |
That's it! You can now make a phone call. |
|
You can make a test call to 17771234567, or if you are signed up for one of Callcentric's rate plans you
can place a call to a traditional landline or mobile phone by dialing either:
1 + the area code and number for calls to the US
Or
011 + the country code, area code, and number for calls worldwide
(you may also use 00 instead of 011).
|
