 | |
| Step 1 |
Launching the application |
|
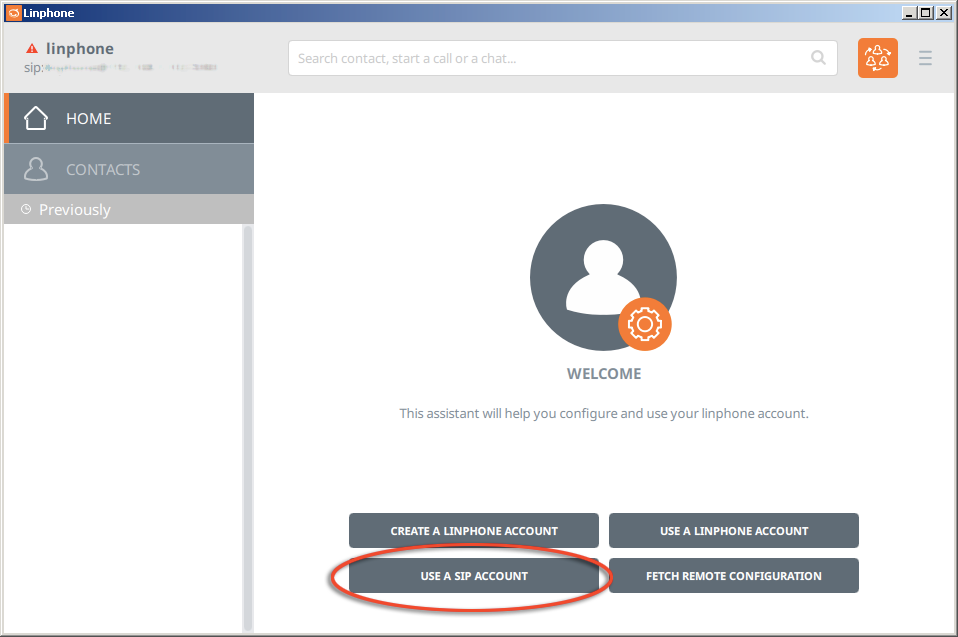
Upon launching the application, you will be directed to the LinPhone Welcome Assistant as shown in the screenshot below. On this page, select USE A SIP ACCOUNT.
|
| Step 2 |
Configuring your Callcentric Account |
|
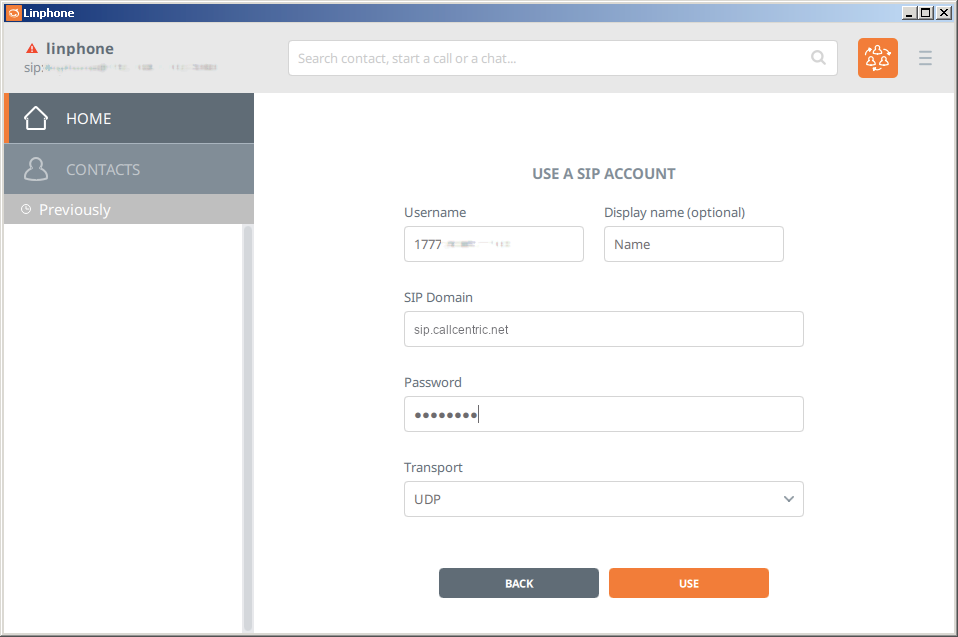
To create your profile, please enter the settings detailed below. Once completed, click the Use button to proceed to the next step.
| |
| Setting | Value |
| Username | This is either the default extension 1777MYCCID OR 1777MYCCIDEXT, where 1777MYCCID is the 1777 number assigned to you by Callcentric and EXT is the three digit extension you are trying to register this UA to.
For example: 17770001234101 would register to extension 101 on account 17770001234.
You cannot register to your account using only the extension number. |
| Display name | You may specify any name on this option |
| SIP Domain | sip.callcentric.net |
| Password | Enter your extension SIP Password here. Your extension SIP password is the password you created for the extension you are trying to use. You may edit the SIP password you wish to use in by logging into your My Callcentric account and clicking on the Extension menu link and then modifying the appropriate extension. |
| Transport | UDP |
|
| Step 3 |
Activating your SIP account |
|
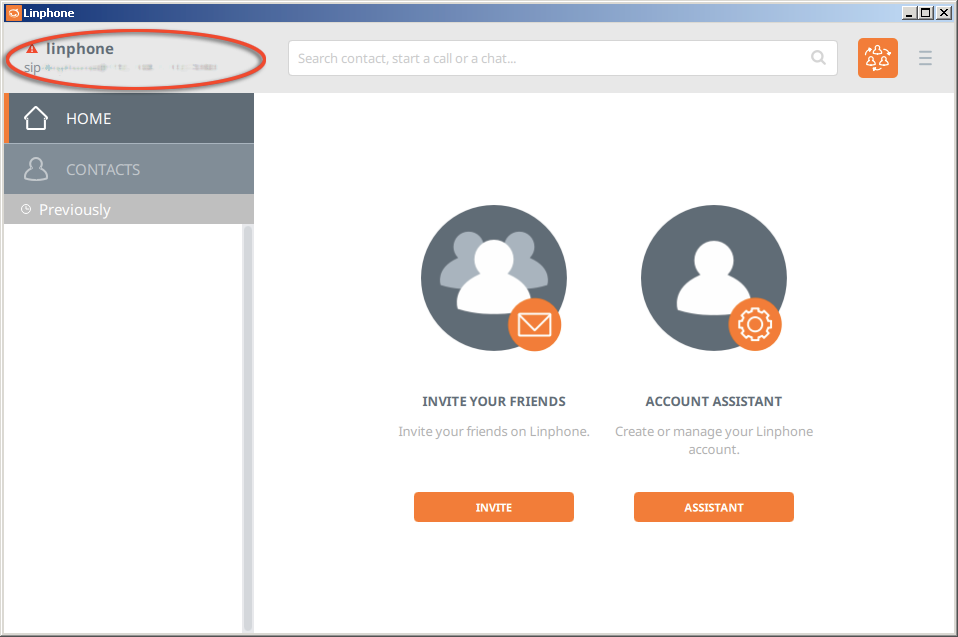
Upon returning back to the main window of the application, click on the top left corner of the application, which will allow you to switch between SIP accounts. Select your Callcentric Account and ensure that you've set the Presence Status option to Available, as detailed in the screenshots below:
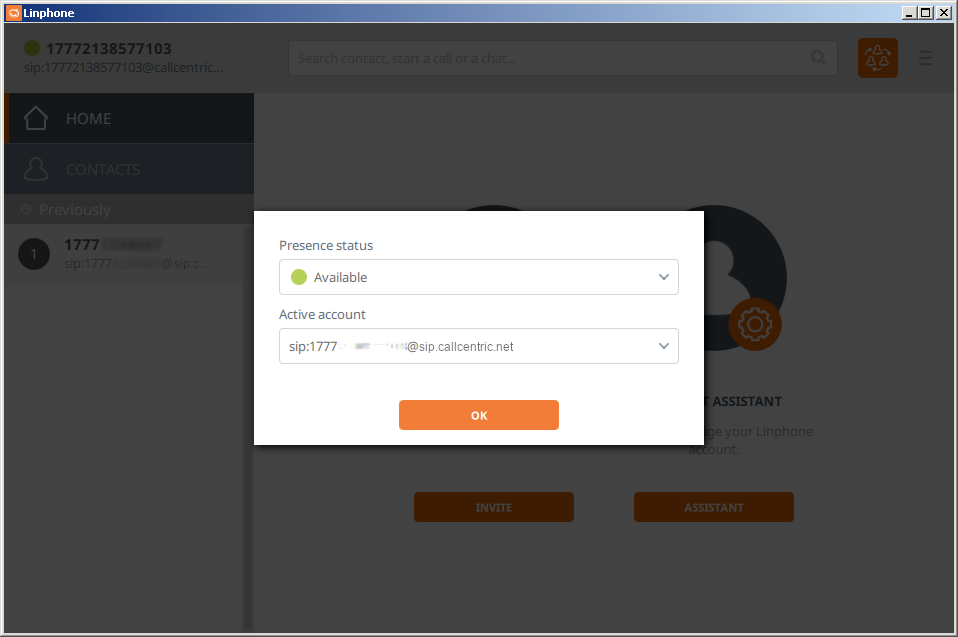
Once completed, click the OK button to proceed to the next step.
|
| Step 4 |
Additional Account Settings |
|
From the main interface screen click on the icon in the upper right corner, which resembles 3 horizontal bars, and select the Preferences option:
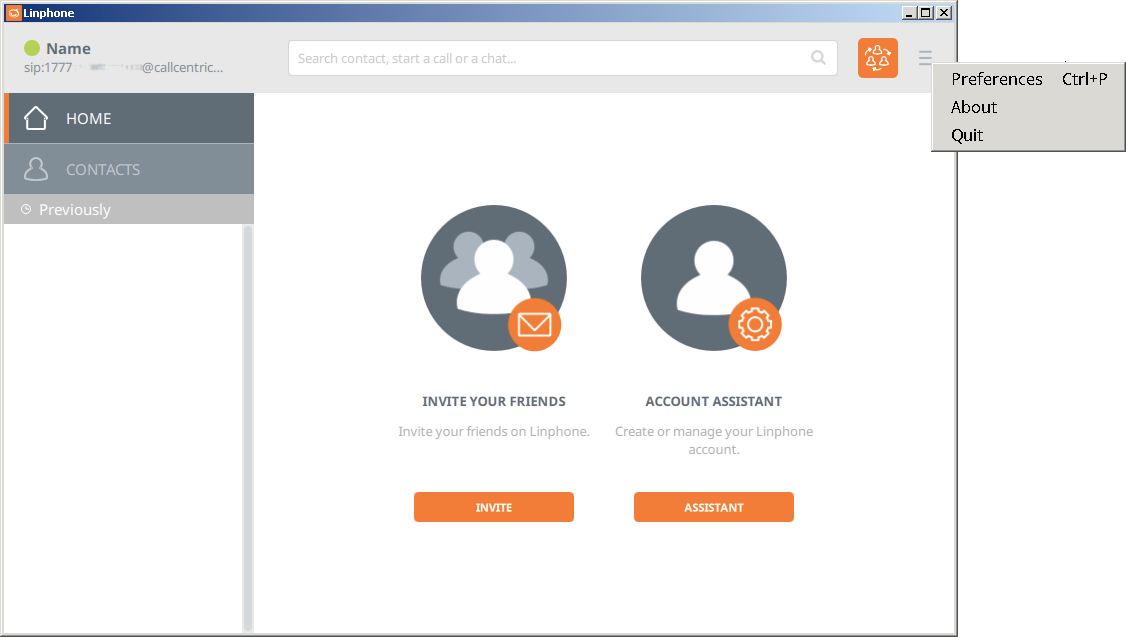
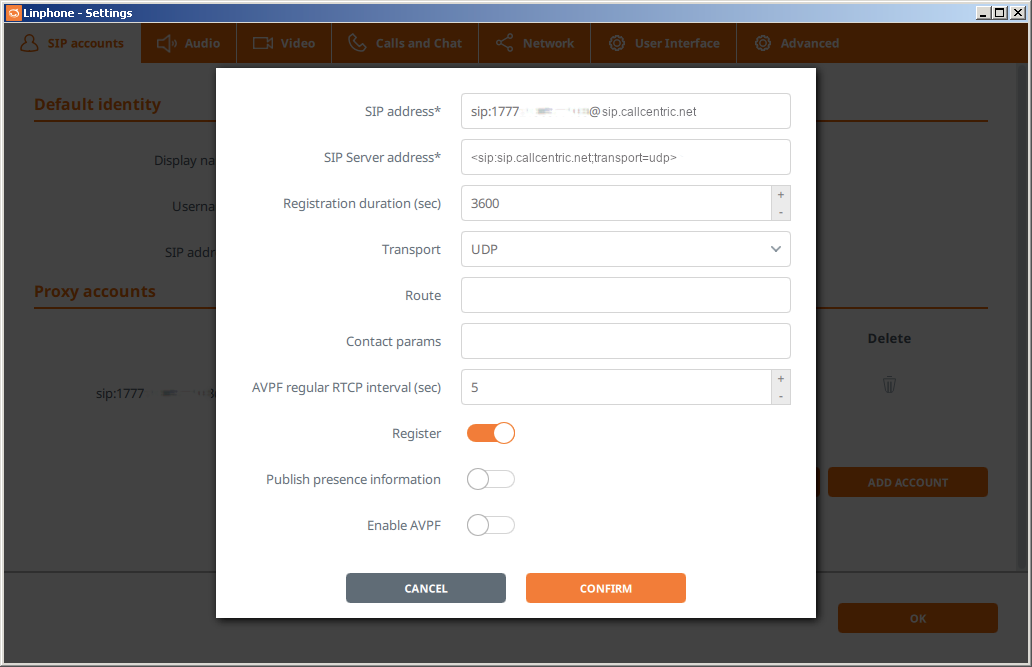
From the SIP accounts tab, locate the section labeled Proxy accounts and click the Edit icon located next to the account that you've created for our service. From this window, set the options detailed below and then click the Confirm button to finish:
| |
| Setting | Value |
| Register | Enabled |
| Enable AVPF | Disabled |
Once completed, click the OK button to proceed to the next step.
|
| Step 6 |
Additional miscellaneous settings |
|
Next, within your Preferences settings window, click on the Audio tab and locate the section labeled Audio codecs. In this section, disable all codecs except for the PCMU (ITU-G.711 ulaw encoder) codec, as detailed in the screeenshot below:

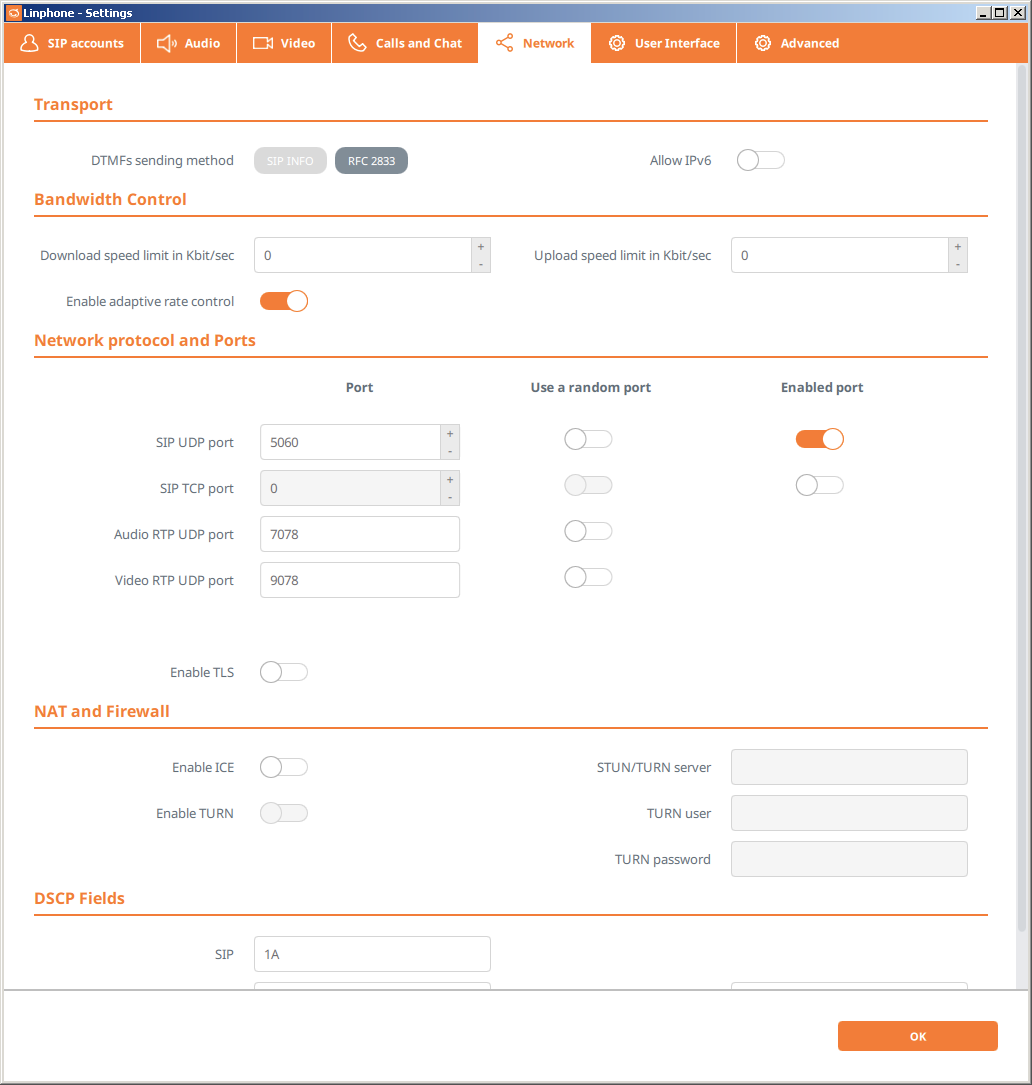
Finally click on the Network tab and ensure that you DISABLE the following settings, as detailed in the screenshot below:
- Allow IPv6
- SIP TCP port
- Enable TLS
Once completed, click the OK button to finish your setup.
|
| Step 7 |
That's it! You can now make a phone call. |
|
You can make a test call to 17771234567, or if you are signed up for one of Callcentric's rate plans you can place a call to a traditional landline or mobile phone by dialing either:
1 + the area code and number for calls to the US
Or
011 + the country code, area code, and number for calls worldwide (you may also use 00 instead of 011).
|
