| GENERAL INFORMATION |
 |
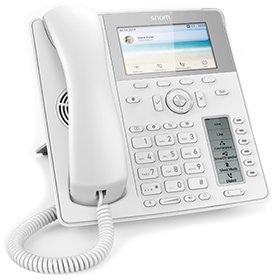 The Snom D785 is a reliable, feature-rich IP Phone that is easy to configure and works excellent with our service. Notable features include a large high-resolution color display, integrated bluetooth, support for more than 12 different accounts, and a convenient second screen for dynamic contact management. The Snom D785 is a reliable, feature-rich IP Phone that is easy to configure and works excellent with our service. Notable features include a large high-resolution color display, integrated bluetooth, support for more than 12 different accounts, and a convenient second screen for dynamic contact management.
|
|
| RESOURCES |
|
Websites:
snom Homepage
snom D785 Product page
Help / Support:
snom D785 Wiki
snom D785 Product Manual
snom D785 Firmware Update
|
|
| Configuring the snom D785 |
|
These instructions are based on snom D785 software version 10.1.33.33. If you are running a different firmware version, some menus/settings may be different. These instructions are also based on using the D785 in its factory default configuration, which obtains a dynamic IP address automatically from your router using DHCP. For information on configuring your snom D785 with a static IP address, please refer to the snom D785 user manual.
We recommend reading each step through in its entirety before performing the action(s) indicated within the step.
|
 | |
| STEP 1 |
Connect your router with the supplied Ethernet network cable to the Snom D785's "Net" port.
Plug the supplied power cable into the snom D785 and wait approximately 60 seconds for the phone to boot up.
Have a pen and paper ready. During the bootup process, the IP address of your phone should be displayed on the screen. Please write this number down.

|
| STEP 2 |
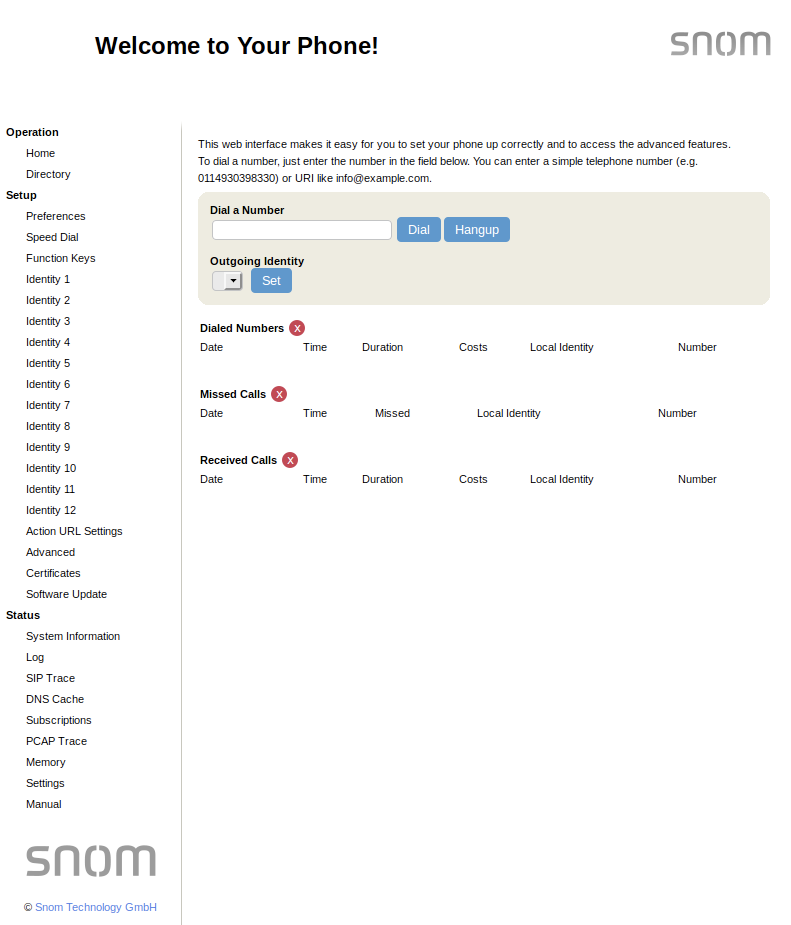
Login to your phone by opening a web browser on your computer (such as Chrome or Firefox) and entering the IP address you wrote down in the previous step into the address bar (I.E. where you would normally enter "www.yahoo.com").
Important Note: By default the snom D785 should not have a password assigned to it. You should now see a page that looks like this:
|
| STEP 3 |
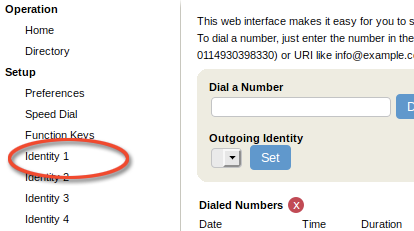
Now we'll begin configuring your accounts. Click on the Identity 1 link, or the identity you wish to configure, as detailed in the screenshot below:
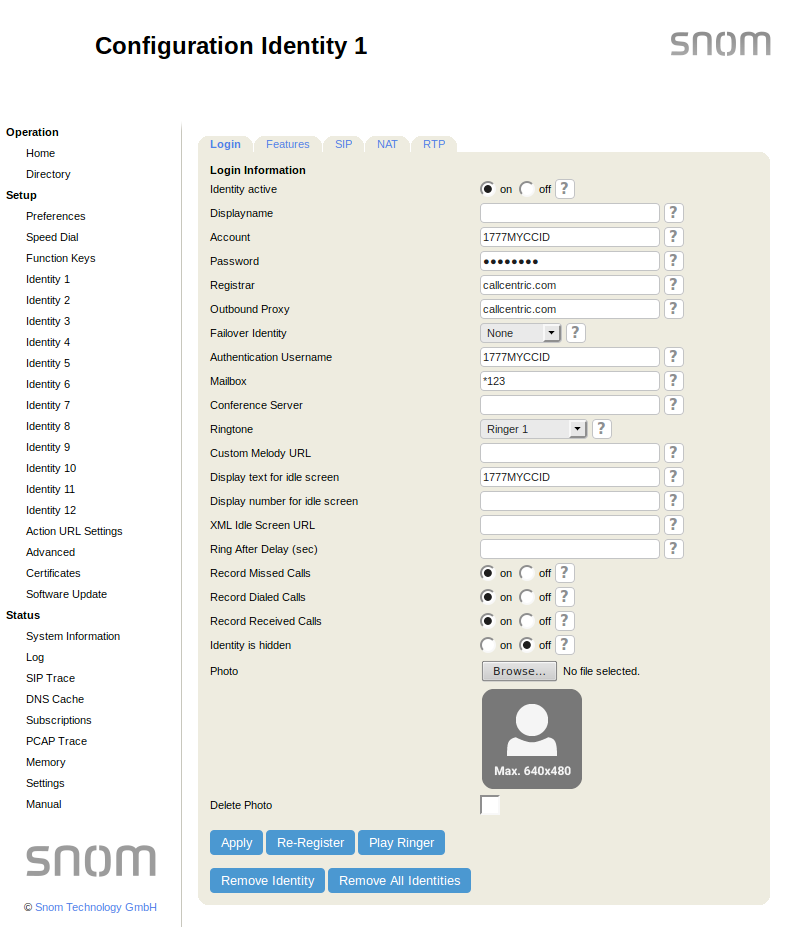
Under the Login configuration page, please enter the settings detailed below and click on the Apply button to save your changes:
| |
| Setting | Value |
| Display Name: | 1777MYCCID, where 1777MYCCID is the 1777 number assigned to you by Callcentric |
| Account: | This is either the default extension 1777MYCCID OR 1777MYCCIDEXT, where 1777MYCCID is the 1777 number assigned to you by Callcentric and EXT is the three digit extension you are trying to register this UA to.
For example: 17770001234101 would register to extension 101 on account 17770001234.
You cannot register to your account using only the extension number. |
| Password: | Enter your extension SIP Password here. Your extension SIP password is the password you created for the extension you are trying to use. You may edit the SIP password you wish to use in by logging into your My Callcentric account and clicking on the Extension menu link and then modifying the appropriate extension. |
| Registrar: | sip.callcentric.net |
| Outbound Proxy: | sip.callcentric.net |
| Authentication Username: | This is either the default extension 1777MYCCID OR 1777MYCCIDEXT, where 1777MYCCID is the 1777 number assigned to you by Callcentric and EXT is the three digit extension you are trying to register this UA to.
For example: 17770001234101 would register to extension 101 on account 17770001234.
You cannot register to your account using only the extension number. |
| Mailbox: | *123 |
| Display text for idle screen: | You may specify any value for this option. For our example, we've entered our 1777 number |
Your configuration should look similar to the screenshot below:
|
| STEP 4 |
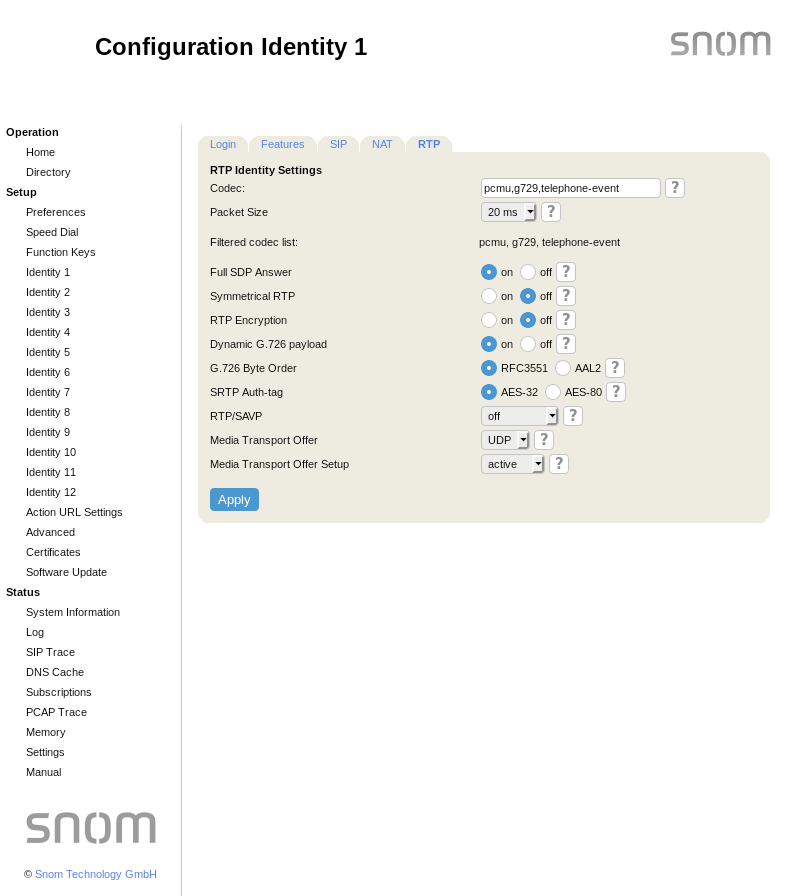
Next, we'll configure your phone's audio settings. Click on the RTP tab and enter the settings detailed below. Once completed, click on the Apply button to save your changes:
| |
| Setting | Value |
| Codec: | pcmu,g729,telephone-event |
| Packet Size: | 20ms |
| Full SDP Answer: | On |
| Symmetrical RTP: | Off |
| RTP Encryption: | Off |
Your configuration should look similar to the screenshot below:
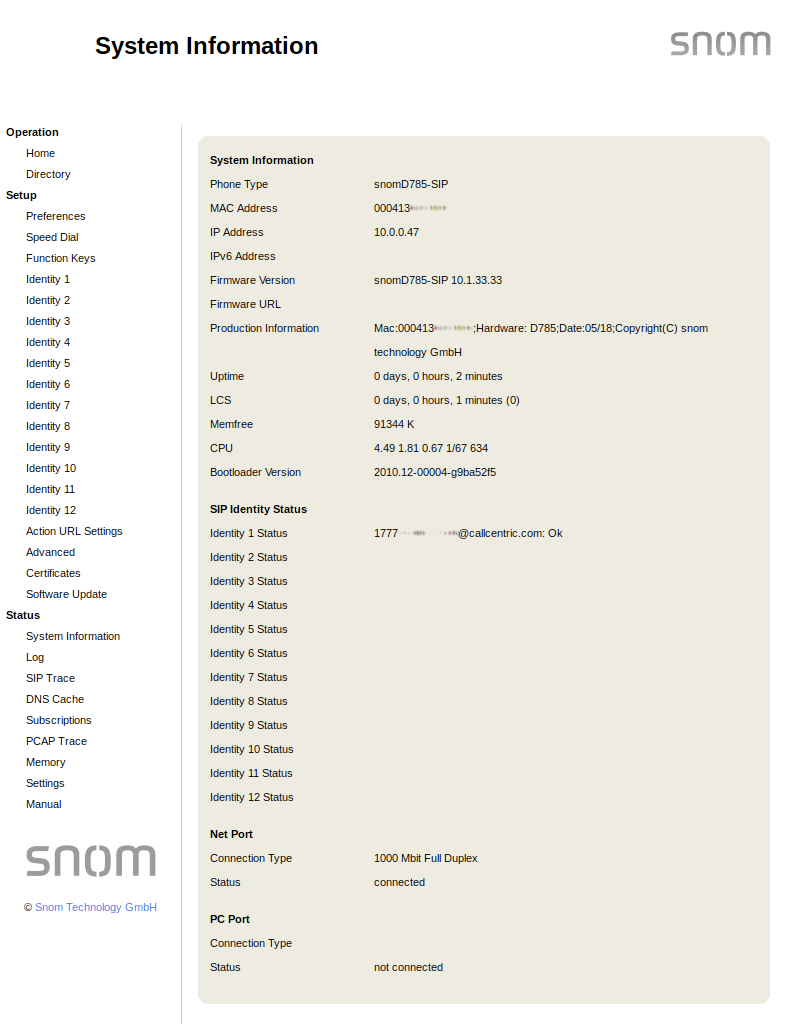
To ensure your D785 has successfully registered to our service, click on the System Information link that is located on the left side menu. You should see Ok listed next to the account that you just configured.
|
| STEP 5 |
That's it! You can now make a phone call. |
|
You can make a test call to 17771234567, or if you are signed up for one of Callcentric's rate plans you
can place a call to a traditional landline or mobile phone by dialing either:
1 + the area code and number for calls to the US
Or
011 + the country code, area code, and number for calls worldwide
(you may also use 00 instead of 011).
|
|
|
