 | |
STEP 1a
|
If this is your first time configuring your SPA3102 then you will need to first find the IP address of your device and then enable HTTP configuration. To do so have a
pen and paper ready to write down the IP address. Once you're ready do the following:
- Pick up you telephone handset
- Dial ****, do this even if you hear a busy signal
- You will hear a message - "Linksys configuration menu. Please enter option followed by the pound key...", then enter 1 1 0 # on your phone.
- You will now hear a message giving you the IP address of your PAP2 such as - "192.168.001.100". Write this number down
Do not hang up yet. as now you will need to enable web-based configuration, since by default the web-based configuration for the WAN port is disabled. To enable web-based configuration:
You will hear the menu prompt again after acquiring the IP address.
After hearing the prompt dial 7932# followed by 1# then 1 when asked to save the change.
You should now have the IP address for your SPA3102 as well as the ability to configure your device through your web browser. Continue onto Step 2 below.
|
|
STEP 1b
|
If you have already enabled web configuration you simply need to acquire your device's IP address in order to configure it.
If your computer is not connected to the yellow port on the back of the SPA3102 then please do the following:
- Pick up you telephone handset
- Dial ****, do this even if you hear a busy signal
- You will hear a message - "Linksys configuration menu. Please enter option followed by the pound key...", then enter 1 1 0 # on your phone.
- You will now hear a message giving you the IP address of your PAP2 such as - "192.168.001.100". Write this number down
Else if your PC is connected to the yellow port on the back or your SPA3102 then the SPA3102 IP should be 192.168.0.1, unless you changed the subnet in your advanced configuration.
Once you have acquired your device's IP continue on to Step 2 below.
|
|
STEP 2
|
Now that you have your device's IP address simply open your favorite web browser and enter the IP address in the address bar and press enter.
Please note: You do not need to enter the leading zero's ( 0 's ) in the IP address. For example if you heard "192.168.001.010" you should change this to "192.168.1.10"
By default the SPA3102 does not have an username/password associated with it. If you are prompted for a username and password please enter the one you configured.
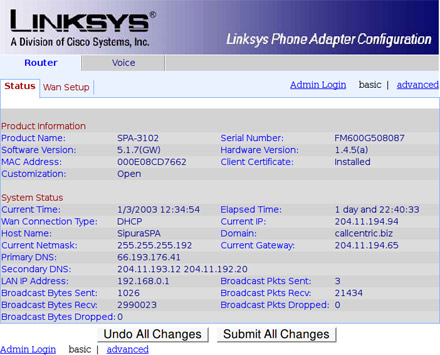
Once logged in you should see a page such as the following:
|
|
STEP 3
|
We now want advanced access to this device so that we may make the proper configuration changes. First click on Admin login from the right side of the page,
then click on Advanced:
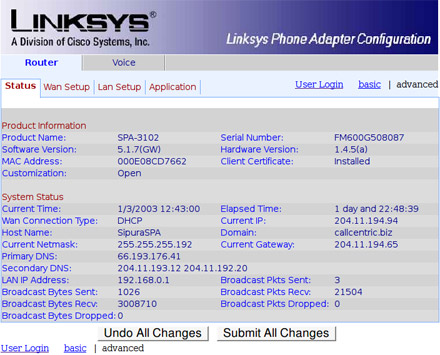
We are now ready to enter your Callcentric account information as well as properly configure your time and DNS servers. Continue to Step 4.
|
|
STEP 4
|
Click on WAN Setup and then make the following changes:
- Set your Primary DNS server to a public DNS server such as 208.67.222.222. You can also set your Secondary DNS server to a
public DNS server such as 208.67.222.220, 4.2.2.1... etc
- Make sure your DNS Server Order is set to Manual, DHCP
- Set your Primary NTP Server to 0.pool.ntp.org, or your preferred working NTP server. You can also
add a Secondary NTP Server if you wish
The time servers indicated in the picture below:
"time.nist.gov" and "time-a.nist.gov" are two primary time servers provided by the US Government for public use. The time server primarily will be used to show the correct time on your phone's caller-id display when you receive a call.
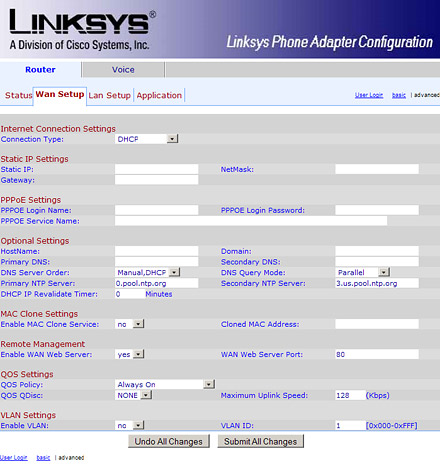
Once done scroll to the bottom of the page and click on Submit All Changes to save your changes.
Once the page reloads click on the Voice tab at the top of the page and go to Step 5.
|
|
STEP 5
|
Click on the tab labeled SIP from the menu at the top.
You will be provided with the various low level SIP protocol and codec related options we will need to change in order to make sure your device is configured properly.
You will want to set the following options:
RTP Packet Size 0.020
G729b Codec Name G729
G729a Codec Name G729
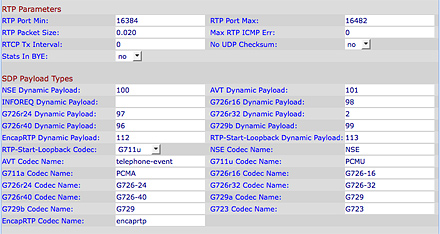
Click the Submit all changes button after you have finished entering all information on the SIP page.
|
|
STEP 6
|
This is the last configuration step of this guide. Here you will configure additional settings specific to your Callcentric account which will enable you to register your SPA3102 to Callcentric.
To being click on the Line 1 option:
| SIP SETTINGS |
| SIP Remote Party ID: | No |
PROXY AND REGISTRATION |
| Proxy: | sip.callcentric.net |
| Outbound Proxy: | sip.callcentric.net |
| Use Outbound Proxy: | yes |
| Use DNS SRV: | yes |
| DNS SRV Auto Prefix: | yes |
| Proxy Redundancy Method: | Based on SRV Port |
SUBSCRIBER INFORMATION |
| Display Name: | Enter your name in this field |
| User ID: | This is either the default extension 1777MYCCID OR 1777MYCCIDEXT, where 1777MYCCID is the 1777 number assigned to you by Callcentric and EXT is the three digit extension you are trying to register this UA to.
For example: 17770001234101 would register to extension 101 on account 17770001234.
You cannot register to your account using only the extension number. |
| Password: | Enter your extension SIP Password here. Your extension SIP password is the password you created for the extension you are trying to use. You may edit the SIP password you wish to use in by logging into your My Callcentric account and clicking on the Extension menu link and then modifying the appropriate extension. |
| Use Auth ID: | yes |
| Auth ID: | This is either the default extension 1777MYCCID OR 1777MYCCIDEXT, where 1777MYCCID is the 1777 number assigned to you by Callcentric and EXT is the three digit extension you are trying to register this UA to.
For example: 17770001234101 would register to extension 101 on account 17770001234.
You cannot register to your account using only the extension number. |
AUDIO CONFIGURATION |
| Preferred Codec: | G729a |
| DTMF Tx Method | Auto |
| Use Preferred Codec Only: | No |
DIAL PLAN |
Within the Dial Plan delete ALL of the current setting and replace it with the following by copying the text below and pasting it into the Dial Plan field:
(*xx.|*xxx|*75xx|[3469]11|0|00|1xxx[2-9]xxxxxxS0|xxxxxxxxxxxx.|**275*x.) |
Click the Save Settings button after you have finished entering all information on the Line 1 page.
Click here to see the screenshot
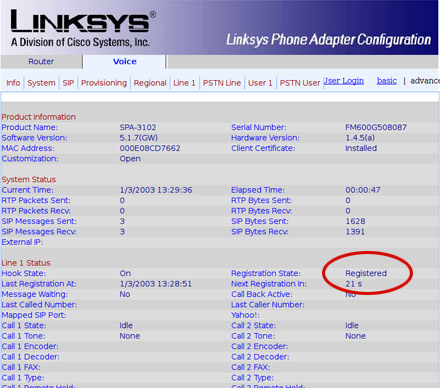
You should now be registered to Callcentric and your Voice Info page should now say Registered:
|
|
STEP 7
|
That's it! You can now make a phone call.
You can make a test call to 17771234567, or if you are signed up for one of Callcentric's rate plans you
can place a call to a traditional landline or mobile phone by dialing either:
1 + the area code and number for calls to the US
Or
011 + the country code, area code, and number for calls worldwide
(you may also use 00 instead of 011). |

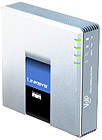 The SPA3102 is a Linksys device, similar to the PAP2/T line of devices in appearance and configuration. In addition to the similar appearance the SPA3102 also adds extra features not present in the PAP2/T such as an FXO (Foreign Exchange Office: allowing you to use a normal PSTN line or PBX line for redundancy in case of an outage on your ISP...etc) and a built in router allowing you to share your internet without the need for a standard router/switch.