| GENERAL INFORMATION |
 |
Jitsi is a simple to configure, simple to use, multi-platform softphone with many useful features. This softphone has been tested and shown to be stable in Windows, Linux and OSX. Although the software supports many other communication methods we will specifically be configuring your Callcentric account for use with SIP.
This setup guide is based on the Jitsi stable version 1.0-beta1-nightly.build.3593 on the Windows platform. Other platforms should have a similar infterface. This setup guide assumes you have properly installed the application on your operating system of choice and have gotten any audio issues resolved before attempting to configure Jitsi for use with Callcentric.
|
|
| RESOURCES |
|
Websites:
Jitsi homepage
Jitsi download page
Help / Support:
Jitsi documentation
|
|
| Configuring Jitsi |
|
 | |
| Step 1 |
Launching Jitsi |
|
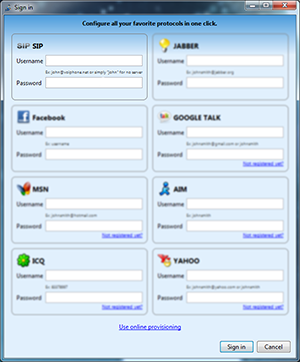
Launch the Jitsi application using the shortcut either on your desktop, your start/applications menu, or your applications folder. If this is your first time running Jitsi you should be greeted with the Sign in screen, showing multiple services.
***If this is not the first time running Jiitsi then on the main interface, please click on Tools > Options (on Mac OSX, please click on Jitsi > Preferences):
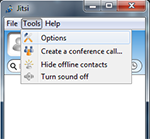 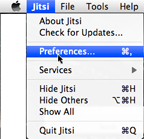
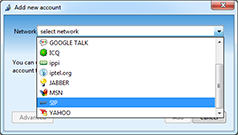
Then choose Add to add a new account. Select SIP from the dropdown list and continue to Step 2.
|
| Step 2 |
Configuring your account information |
|
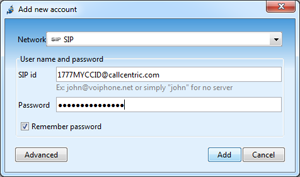
On the SIP section of the Sign in screen, or if adding an account from your preferences, specify your Callcentric account credentials in the format:
Username: This is either the default extension 1777MYCCID OR 1777MYCCIDEXT, where 1777MYCCID is the 1777 number assigned to you by Callcentric and EXT is the three digit extension you are trying to register this UA to.
For example: 17770001234101 would register to extension 101 on account 17770001234.
You cannot register to your account using only the extension number.
Password: Enter your extension SIP Password here. Your extension SIP password is the password you created for the extension you are trying to use. You may edit the SIP password you wish to use in by logging into your My Callcentric account and clicking on the Extension menu link and then modifying the appropriate extension.
After specifying your username/ password, click on the Sign in button on the bottom of the Sign in screen.
|
| Step 3 |
Configuring network and media |
|
Here we will configure options related to network, audio and video. For users who wish to use video please note that our attempts at the time of writing this guide were not successful. You may perform your own tests however please keep our results in mind.
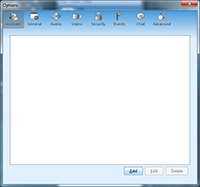
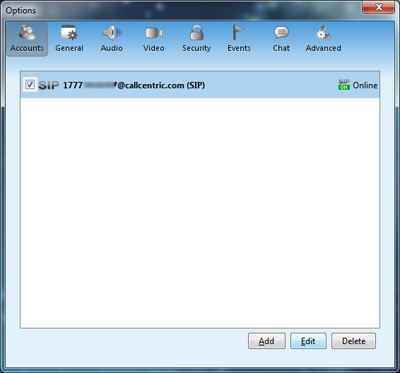
On the main interface, please click on Tools > Options (on Mac OSX, please click on Jitsi > Preferences). From there, please select your Callcentric profile and click on the EDIT button on the bottom of the Options page:
- Under the Connections tab, locate the Keep alive section and set the following options:
Keep alive method: REGISTER
Keep alive interval: 60
Disable/uncheck: Enable support to encrypt calls

Click on the Next button, which should bring you to the Summary window.
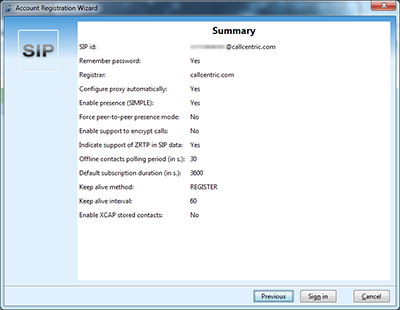 Click on the Sign in button to finish.
- After clicking Sign in you will be taken back to the accounts window. This time click on the Audio tab and disable all codecs except for the following options:
PCMU/8000
telephone-event/8000
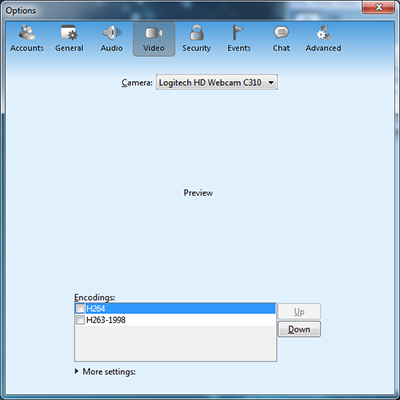
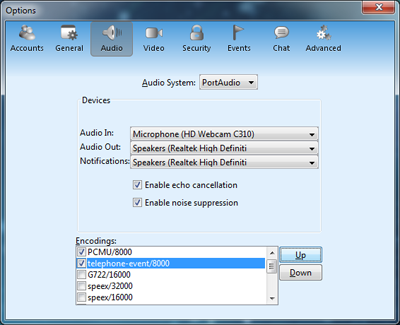 Once you have made these changes, please click on the Video tab and disable all video codecs.
After making the above changes, please close out the Options window, and go back to the main interface.
|
| Step 4 |
That's it! You can now make a phone call. |
|
You can make a test call to 17771234567, or if you are signed up for one of Callcentric's rate plans you
can place a call to a traditional landline or mobile phone by dialing either:
1 + the area code and number for calls to the US
Or
011 + the country code, area code, and number for calls worldwide
(you may also use 00 instead of 011).
|
|
|
