| GENERAL INFORMATION |
 |
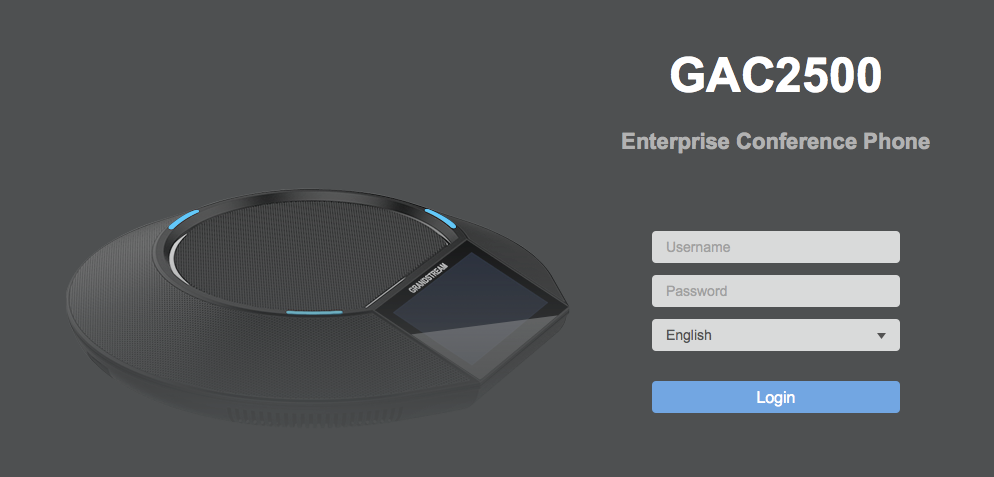
 Grandstream's GAC2500 is an advanced conference phone running on the Android OS. The GAC2500 is one of the most feature rich conference phones we've tested; highlights include Google Play Store access, Bluetooth/WiFi Compatibility, HD Audio Support, Gigabit Network Ports, and support for up to 6 SIP Accounts. Grandstream's GAC2500 is an advanced conference phone running on the Android OS. The GAC2500 is one of the most feature rich conference phones we've tested; highlights include Google Play Store access, Bluetooth/WiFi Compatibility, HD Audio Support, Gigabit Network Ports, and support for up to 6 SIP Accounts.
|
|
| RESOURCES |
|
Website:
Grandstream Home Page
Grandstream GAC2500 Product Page
Help / Support
GAC2500 Product Manual
Grandstream's Firmware Repository
|
|
| Configuring the GAC2500 |
|
The setup guide below is based the GAC2500 running on firmware revision 1.0.3.17, if you are running a different firmware version, some menus/settings may be different. These instructions are also based on using the GAC2500 in its factory default configuration, which obtains a dynamic IP address automatically from your router using DHCP. For information on configuring your GAC2500 with a static IP address, please refer to the GAC2500 user manual.
In this guide we will go through configuring the GAC2500 in order to register to the Callcentric servers so that you will be able to place and receive calls using your Callcentric account. Before proceeding, please ensure that you have properly added the device to your network by connecting it to your router or gateway.
We recommend that you read each step through in its entirety before performing the action(s) indicated within the step.
Note: Although this device supports many advanced features/options, this guide will only detail the specific settings which are required to establish basic connectivity between your GAC2500 and our service. If you need additional assistance with any specific issue please let us know.
|
 | |
| STEP 1 |
Logging into your device |
|
Login to the GAC2500's administrative interface by using the default username admin and default password admin.
|
| STEP 2 |
Configuring your Callcentric account |
|
From the top menu bar, click on the Account option. After doing so, select the Account 1 option from the sub menu on the top of the screen.
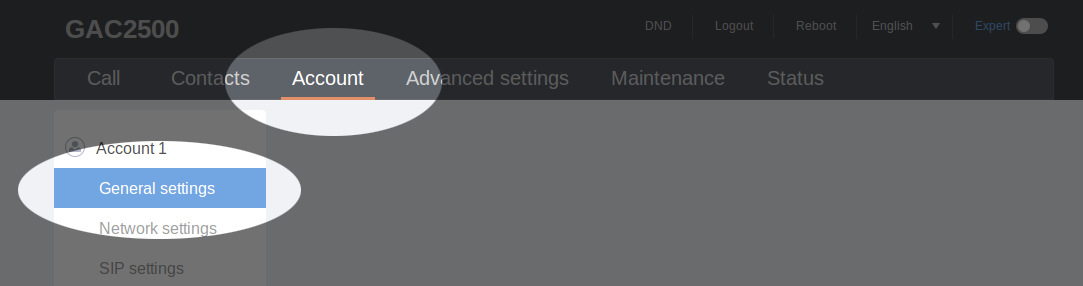
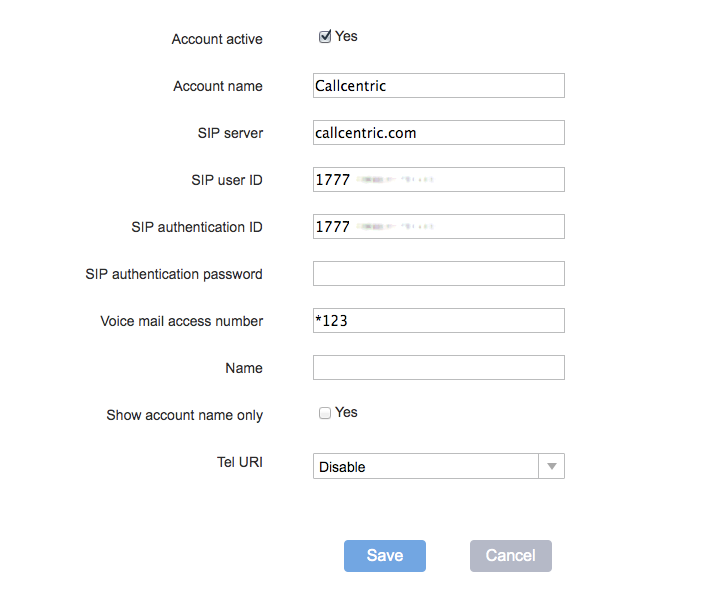
You should now be in the General Settings configuration page of your conference phone. Please configure your settings in-line with those detailed in the screenshot below. After doing so, click on the Save button to apply/save your settings:
| Setting | Value |
| Account Active | checked/enabled |
| Account Name | callcentric |
| SIP Server | sip.callcentric.net |
| SIP User ID | This is either the default extension 1777MYCCID OR 1777MYCCIDEXT, where 1777MYCCID is the 1777 number assigned to you by Callcentric and EXT is the three digit extension you are trying to register this UA to.
For example: 17770001234101 would register to extension 101 on account 17770001234.
You cannot register to your account using only the extension number. |
| SIP Authentication ID | This is either the default extension 1777MYCCID OR 1777MYCCIDEXT, where 1777MYCCID is the 1777 number assigned to you by Callcentric and EXT is the three digit extension you are trying to register this UA to.
For example: 17770001234101 would register to extension 101 on account 17770001234.
You cannot register to your account using only the extension number. |
| SIP Authentication Password | Enter your extension SIP Password here. Your extension SIP password is the password you created for the extension you are trying to use. You may edit the SIP password you wish to use in by logging into your My Callcentric account and clicking on the Extension menu link and then modifying the appropriate extension. |
| Voice Mail UserID | *123 |
| Name | You may specify any name on this field |
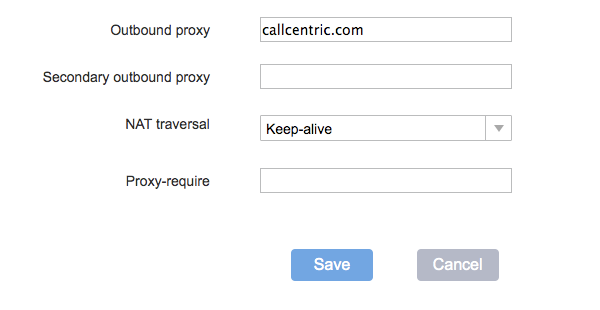
Next, locate the Network Settings menu option on the side menu bar. On this page, please use the settings detailed in the screen captures below. After you have finished entering these settings, click on the Save button to apply/save your settings:
| Setting | Value |
| Outbound Proxy | sip.callcentric.net |
| NAT Traversal | keep-alive |
Next, from the side menu bar, navigate to SIP Settings. Please configure your settings in-line with those detailed in the screenshots below. After doing so, click on the Save button to apply/save your settings:
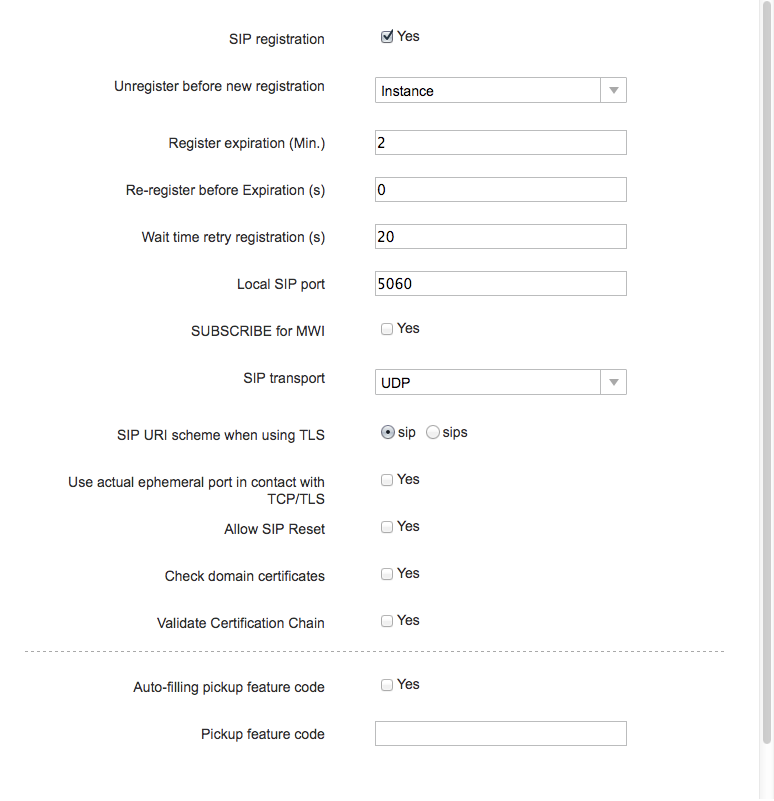
| Setting | Value |
| SIP Registration | check/enabled |
| Register expiration (Min.) | 2 |
| Auto-filling pickup feature code | unchecked/disabled |
Next, click on Audio Settings which is located on the side menu bar. Please configure your settings in-line with those detailed in the screenshots below. After doing so, click on the Save button to apply/save your settings:
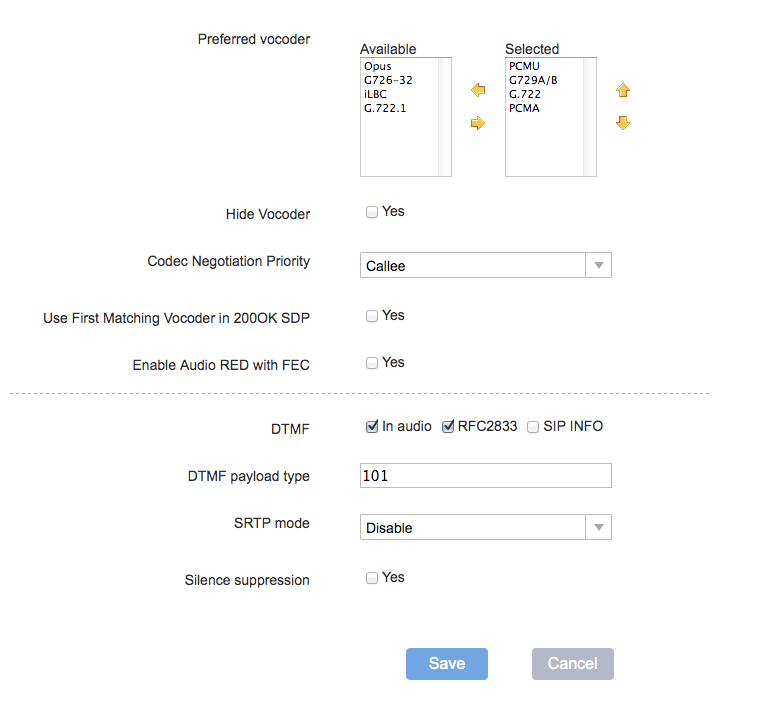
| Setting | Value |
| Preferred Vocoder | PCMU
G729A/B
G.722
PCMA |
| DTMF | check/enable both in-audio and via RTP (RFC2833) |
Next, click on Call Settings which is located on the side menu bar. Please configure your settings in-line with those detailed in the screenshots below. After doing so, click on the Save button to apply/save your settings:
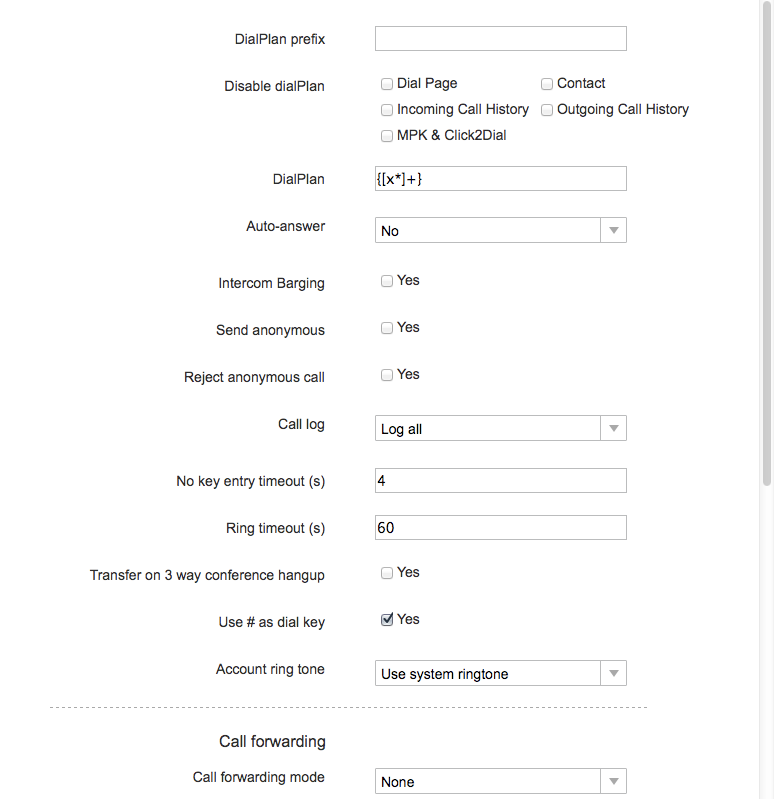
| Setting | Value |
| Dialplan | {[x*]+} |
|
| STEP 3 |
Checking Registration Status |
|
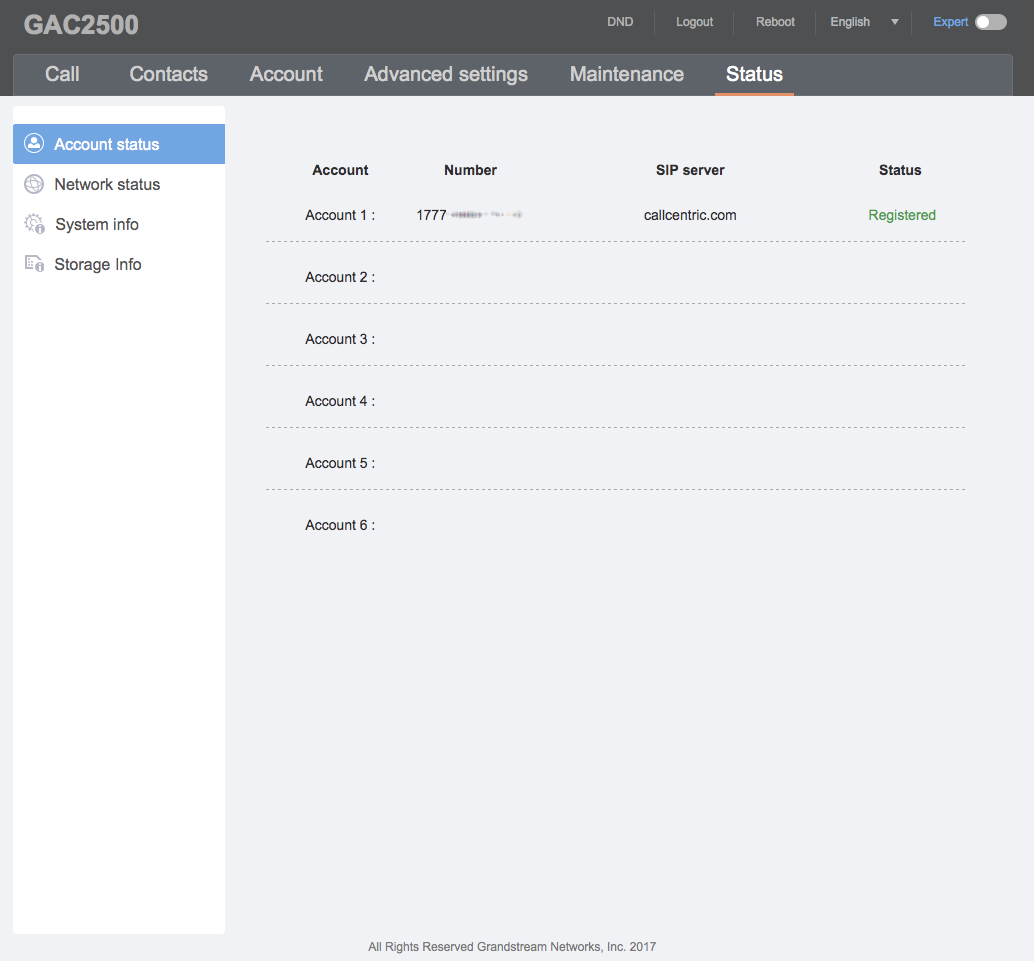
To ensure that your GAC2500 has successfully registered to our service, click on the Status option on the top menu bar and locate the Account Status section. You should see that the account you just configured is now Registered.
|
| STEP 4 |
That's it! You can now make a phone call |
|
You can make a test call to 17771234567, or if you are signed up for one of Callcentric's rate plans you can place a call to a traditional landline or mobile phone by dialing either:
1 + the area code and number for calls to the US
Or
011 + the country code, area code, and number for calls worldwide (you may also use 00 instead of 011).
|
|
|
