 | |
| STEP 1a |
We will need to boot up your device and acquire the IP address in order to begin configuration. To do this, connect your router with the supplied Ethernet network cable to the ethernet port labeled "LAN 1" found on the DX800A. Finally plug the supplied power cable into the device also. Wait 60 seconds after plugging the base station's power adapter.
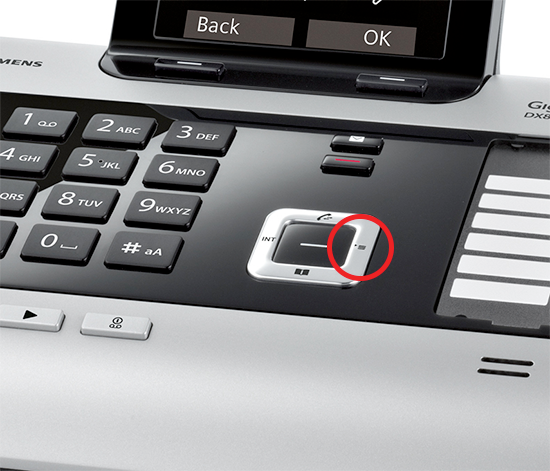
Once your device is fully booted up press the MENU button located on the face of the base station, as indicated by the screen shot below:
|
| STEP 1b |
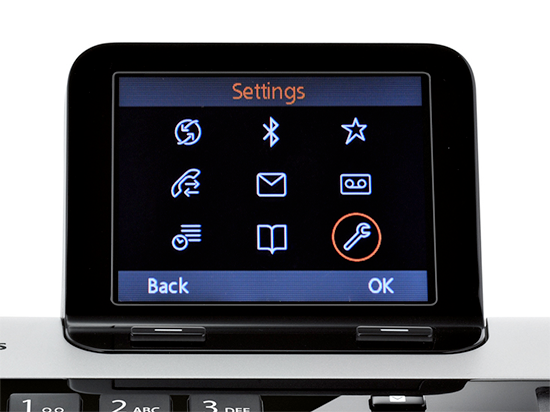
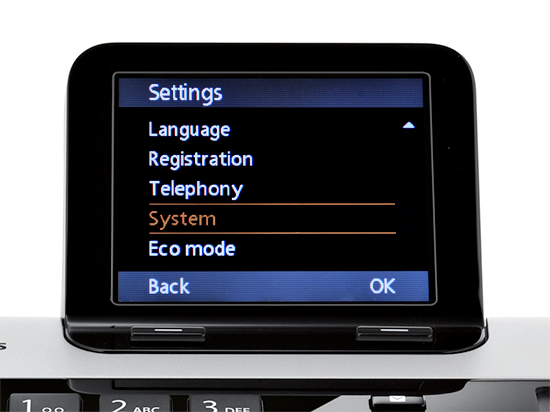
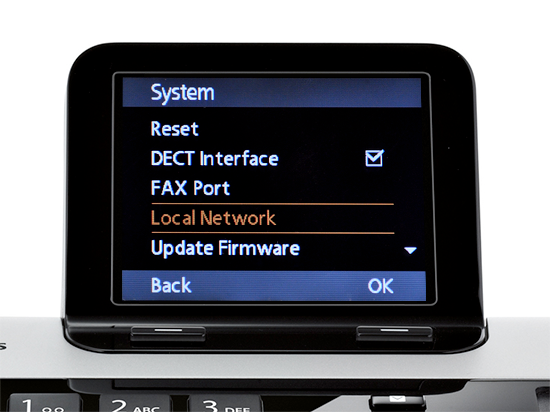
To acquire the IP address, navigate to "wrench" icon -> System -> Local Network and take note of the IP address you receive.

|
| STEP 2 |
Once you have the IP address of your device, open a web browser on your computer such as Internet Explorer, or Firefox and enter the IP address you've saw on the phone's interface (I.E. where you would normally enter www.yahoo.com). You should be greeted with the login screen:
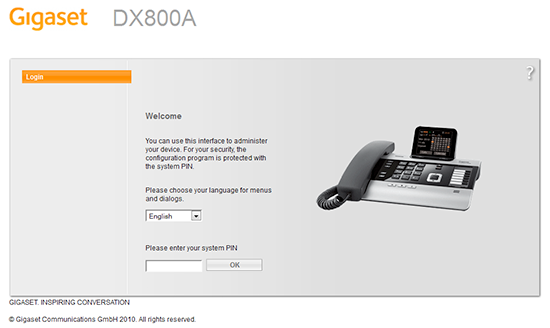
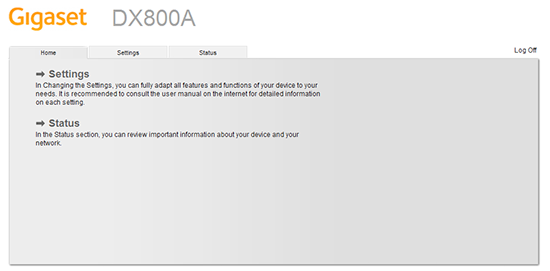
Enter the system PIN for the DX800A on the given field. The default system PIN for the DX800A is 0000. Once logged in you should see the splash screen for the DX800A:
|
| STEP 3 |
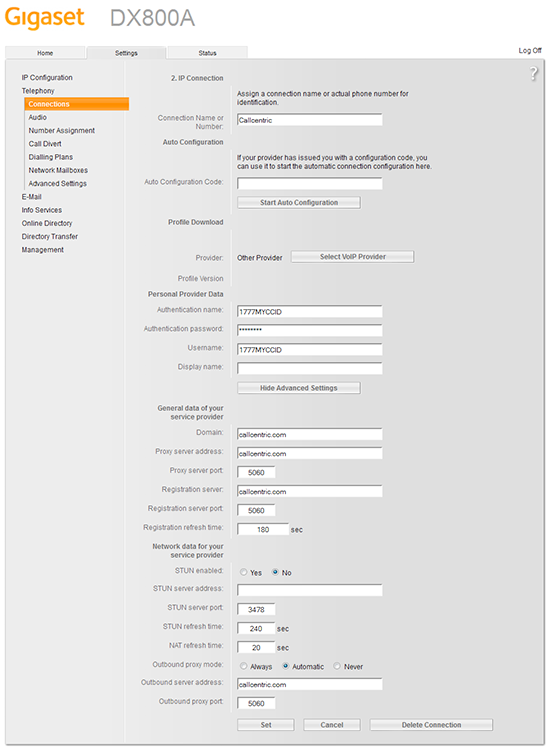
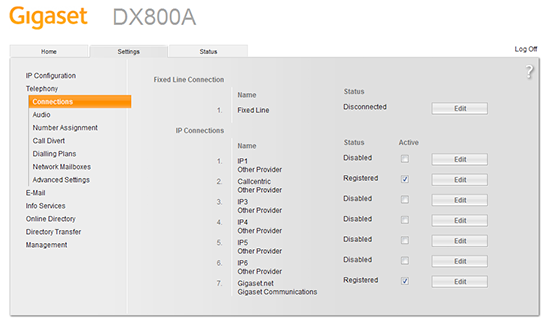
We will now begin configuring the device to connect to your Callcentric account. On the Settings configuration page, click the Telephony link in the side menu bar a then click Edit for the Connection you wish to configure Callcentric on.:

|
| STEP 4 |
Once you click Edit you will want to click on the Show Advanced Settings button, and use the following settings.
| |
| Setting | Value |
| Connection Name or Number: | Callcentric |
| Authentication name: | This is either the default extension 1777MYCCID OR 1777MYCCIDEXT, where 1777MYCCID is the 1777 number assigned to you by Callcentric and EXT is the three digit extension you are trying to register this UA to.
For example: 17770001234101 would register to extension 101 on account 17770001234.
You cannot register to your account using only the extension number. |
| Authentication password: | Enter your extension SIP Password here. Your extension SIP password is the password you created for the extension you are trying to use. You may edit the SIP password you wish to use in by logging into your My Callcentric account and clicking on the Extension menu link and then modifying the appropriate extension. |
| Username: | This is either the default extension 1777MYCCID OR 1777MYCCIDEXT, where 1777MYCCID is the 1777 number assigned to you by Callcentric and EXT is the three digit extension you are trying to register this UA to.
For example: 17770001234101 would register to extension 101 on account 17770001234.
You cannot register to your account using only the extension number. |
| Display name: | 1777MYCCID, where 1777MYCCID is the 1777 number assigned to you by Callcentric |
| Domain: | sip.callcentric.net |
| Proxy server address: | sip.callcentric.net |
| Proxy server port: | 5060 |
| Registration server: | sip.callcentric.net |
| Registration server port: | 5060 |
| Registration refresh time: | 60 |
| STUN enabled: | No |
| STUN server address: | |
| Outbound proxy mode: | Always |
| Outbound server address: | sip.callcentric.net |
| Outbound proxy port: | 5060 |
Once done, click the Set button to save your changes. Your configuration should look similar to the one shown in the picture below:
|
| STEP 5 |
Next, click the Audio option, followed by the Show Advanced Settings button and ensure that the G.711u and G.729 codecs are the only codecs listed under the Selected Codecs option. Once done, click on the Set button to save your changes. Your configuration should look similar to the one shown in the picture below:

|
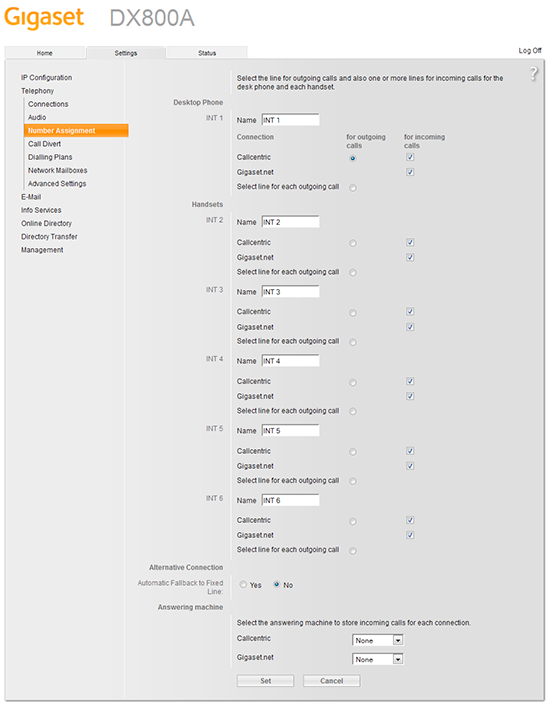
| STEP 6 |
We will now have to make sure incoming and outgoing calls are routed properly. To do this, click on Number Assignment, the select the radio button under for outgoing calls that corresponds to the Callcentric account and ensure that the checkbox under for incoming calls that corresponds to the Callcentric account is also checked. Once done, click on the Set button to save your changes.
|
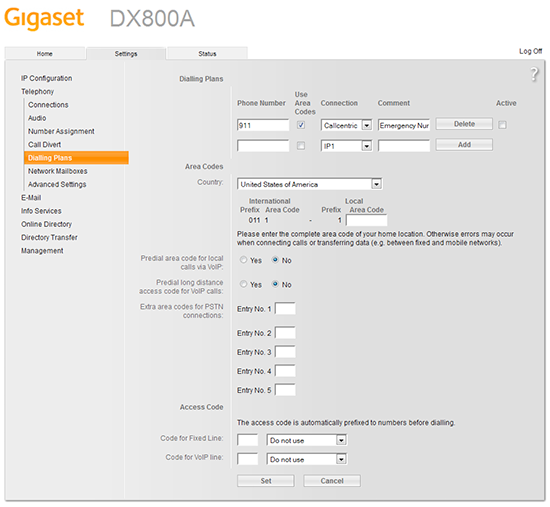
| STEP 7 |
Finally, click on Dialing Plans, ensure that you have the following:
| |
| Setting | Value |
| Phone Number | 911 |
| Use Area Code | Unchecked |
| Connection | Callcentric |
| Active | Checked |
Once done, click on the Set button to save your changes.
You should now be registered and can check this on your status page.
|
| STEP 8 |
That's it! You can now make a phone call. |
|
You can make a test call to 17771234567, or if you are signed up for one of Callcentric's rate plans you
can place a call to a traditional landline or mobile phone by dialing either:
1 + the area code and number for calls to the US
Or
011 + the country code, area code, and number for calls worldwide
(you may also use 00 instead of 011).
|

 Gigaset's DX800A is a multi line SIP device supporting both standard PSTN and SIP accounts. The DX800A has robust features including the ability to expand functionality by adding extra handsets. With a built in answering machine and a TFT color display, the DX800A can look both stylish and provide needed functionality in a home or office environment.