 | |
STEP 1
|
Connect your device's power and ethernet cables.
For users with the SPA112:
Connect your router with the supplied Ethernet network cable to the SPA112's internet port. Now connect your phone to the SPA112's Phone 1 port. Finally plug the supplied power cable into the SPA112.
For users with the SPA122:
Connect your router with the supplied Ethernet network cable to the SPA122's Internet port. Temporarily connect your computer to the SPA122's Ethernet port using a Ethernet network cable (this is necessary as the SPA122 will not allow you to access the web configuration interface without changing the default web password). Now connect your phone to the SPA122's Phone 1 port. Finally plug the supplied power cable into the SPA122.
|
STEP 2
|
Wait 60 seconds after plugging your SPA112/SPA122 in.
Pick up the phone connected to the SPA112/SPA122 and dial the * key on your phone 4 times.
For users with the SPA112:
Have a pen and paper ready. You will hear a message - Enter a menu option, then enter 1 1 0 on your phone. You will now hear a message giving you the IP address of your SPA112 such as - "192.168.001.010" and write this number down.
For users with the SPA122:
Have a pen and paper ready. You will hear a message - Enter a menu option, then enter 2 1 0 on your phone. You will now hear a message giving you the IP address of your SPA122 such as - "192.168.001.010" and write this number down.
|
STEP 3
|
Open a web browser on your computer such as Firefox or Chrome and enter the IP address you heard in step 4 as the address (I.E. where you would normally enter www.yahoo.com).
Please note: some browsers will require you to remove leading zero's ( 0 's ) in the IP address. For example if you heard "192.168.001.010" you should change this to "192.168.1.10".
You should now see a page that looks like this:
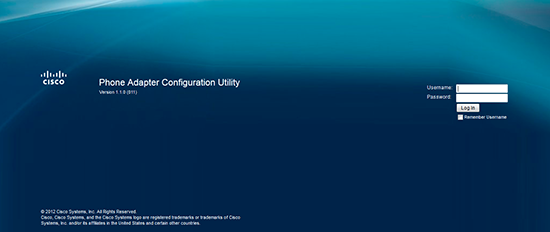
Enter the default credentials in the appropriate fields. For the SPA112/SPA122 please specify "admin" as the username, and "admin" as the password (without quotes).
|
STEP 4
|
After entering the password you should see a screen that looks similar to the one below:
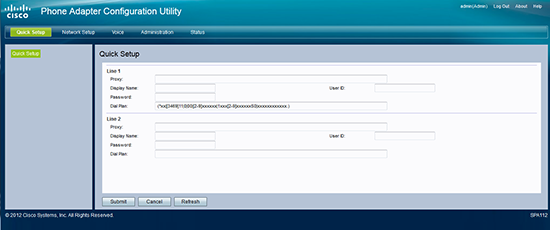
Click on Network Setup in the top menu bar, and click on the Internet Settings link on the left side navigation bar and configure your settings accordingly (as shown below):
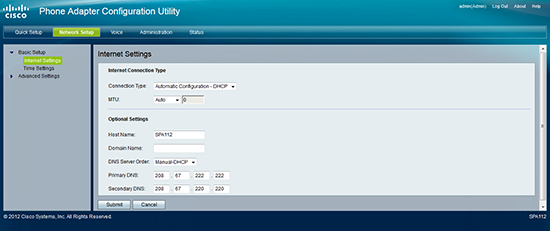
Please use the following settings:
| Menu Item | Setting |
| DNS Server Order: | Manual-DHCP |
| Primary DNS: | 208.67.222.222 |
| Secondary DNS: | 208.67.220.220 |
Once you have made your changes click on the Submit button to save your changes.
|
STEP 5
|
Next, click on the Time settings link on the side navigation bar and configure your settings accordingly (as shown below):
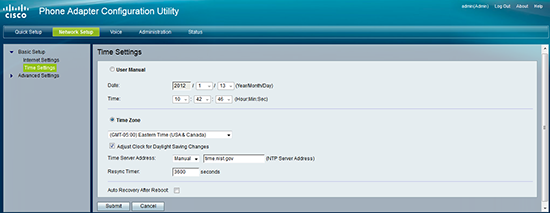
| Menu Item | Setting |
| Time Zone: | Select your specific time zone |
| Time Server Address: | Manual, time.nist.gov |
Click the Submit button to save your changes.
|
STEP 6
|
Now, click on Voice on the top menu bar, and click on the SIP link on the side navigation bar and configure your settings accordingly (as shown below):
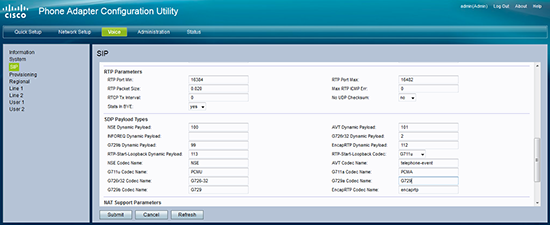
| Menu Item | Setting |
| RTP Packet Size: | 0.020 |
| G729a Codec Name: | G729 |
| G729b Codec Name: | G729 |
Click the Submit button to save your changes.
|
STEP 7
|
We will now configure your Callcentric credentials. To do this click on the Line 1 link on the side navigation bar and configure your settings accordingly (as shown below):
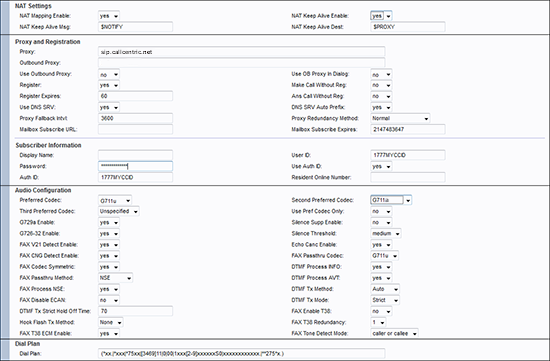
| Menu Item | Setting |
| NAT Mapping Enable: | Yes |
| NAT Keep Alive Enable: | Yes |
| Proxy: | sip.callcentric.net |
| Outbound Proxy: | sip.callcentric.net |
| Register Expires: | 60 |
| Use DNS SRV: | Yes |
| DNS SRV Auto Prefix: | Yes |
| User ID: | This is either the default extension 1777MYCCID OR 1777MYCCIDEXT, where 1777MYCCID is the 1777 number assigned to you by Callcentric and EXT is the three digit extension you are trying to register this UA to.
For example: 17770001234101 would register to extension 101 on account 17770001234.
You cannot register to your account using only the extension number. |
| Password: | Enter your extension SIP Password here. Your extension SIP password is the password you created for the extension you are trying to use. You may edit the SIP password you wish to use in by logging into your My Callcentric account and clicking on the Extension menu link and then modifying the appropriate extension. |
| Auth ID: | This is either the default extension 1777MYCCID OR 1777MYCCIDEXT, where 1777MYCCID is the 1777 number assigned to you by Callcentric and EXT is the three digit extension you are trying to register this UA to.
For example: 17770001234101 would register to extension 101 on account 17770001234.
You cannot register to your account using only the extension number. |
| Use Auth ID: | Yes |
| Preferred Codec: | G711u |
| Second Preferred Codec: | G711a |
| Dial Plan: | (*xxx|*75xx|[49]11|0|00|1xxx[2-9]xxxxxxS0|xxxxxxxxxxxx.|**275*x.) |
After you have configured your line settings click the Submit button to save your changes.
|
STEP 8
|
That's it! You can now make a phone call.
You can make a test call to 17771234567, or if you are signed up for one of Callcentric's rate plans you
can place a call to a traditional landline or mobile phone by dialing either:
1 + the area code and number for calls to the US
Or
011 + the country code, area code, and number for calls worldwide
(you may also use 00 instead of 011). |

 Cisco's SPA112 (SPA1XX) series of products are the successors to the popular PAP2 and PAP2T line of adapters. These telephone adapters are reliable and work with the Callcentric service when placed behind your broadband internet router.