 | |
STEP 1
|
If you haven't as of yet, please install X-Lite. Once you have X-Lite installed please run the application.
|
STEP 2A
|
If you have just installed X-Lite you will see a screen similar to the one below:
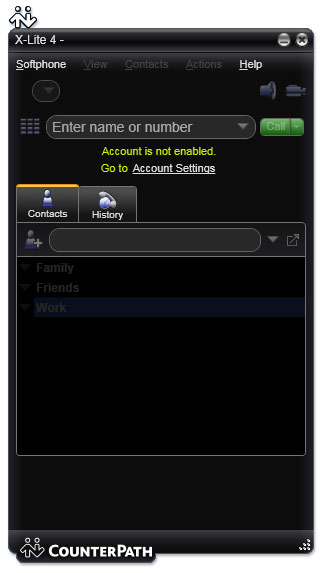
If you see this window click on the Account Settings link. Otherwise go to step 2B. |
STEP 2B
|
If you already had X-Lite installed then please access the account configuration menu.
- For OSX you can click on the X-Lite 4 menu at the top left of the screen. Then click on Preferences and Accounts to view the currently configured account. You can then double click the current account to enter the account configuration dialog.
- For windows please click on the Softphone menu at the top left of the application. Then click on Account Settings to enter the account configuration dialog.
|
STEP 3
|
After you have accessed the account configuration interface you will see a window with tabs across the top, and fields to be filled in. Follow the directions below for how to fill the fields within each tab.
Within the Account tab fill in the fields as explained below:
| Field | Setting |
| Display Name: | Enter your name in this field |
| Username: | This is either the default extension 1777MYCCID OR 1777MYCCIDEXT, where 1777MYCCID is the 1777 number assigned to you by Callcentric and EXT is the three digit extension you are trying to register this UA to.
For example: 17770001234101 would register to extension 101 on account 17770001234.
You cannot register to your account using only the extension number. |
| Password: | Enter your extension SIP Password here. Your extension SIP password is the password you created for the extension you are trying to use. You may edit the SIP password you wish to use in by logging into your My Callcentric account and clicking on the Extension menu link and then modifying the appropriate extension. |
| Authorization name: | This is either the default extension 1777MYCCID OR 1777MYCCIDEXT, where 1777MYCCID is the 1777 number assigned to you by Callcentric and EXT is the three digit extension you are trying to register this UA to.
For example: 17770001234101 would register to extension 101 on account 17770001234.
You cannot register to your account using only the extension number. |
| Domain: | Enter sip.callcentric.net in this field |
In addition the Register with domain and receive calls option should be checked and the Domain radio button selected.
The dialing plan should be left as its default which is: #1\a\a.T;match=1;prestrip=2;
Below is an example:
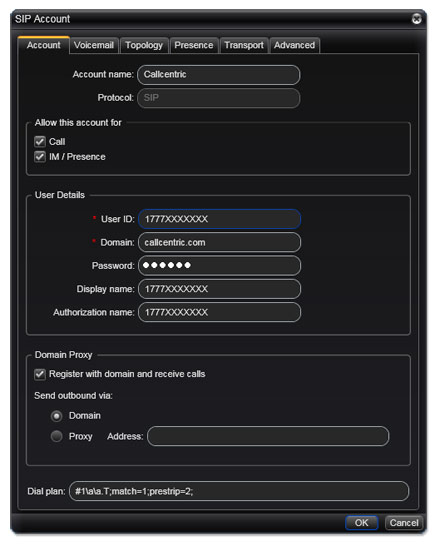
Once done please click on the Topology tab.
|
STEP 4
|
Within the Topology tab make sure that the settings are configured as shown in the picture below:
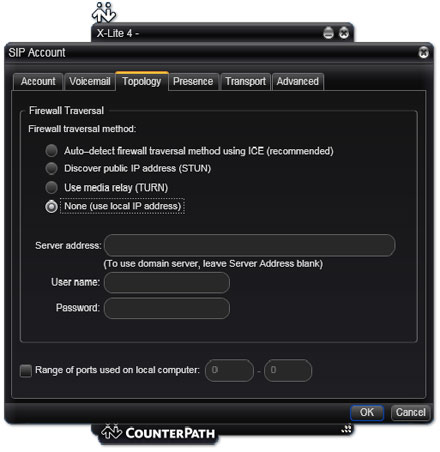
Once setup as above please click the Advanced tab.
|
STEP 5
|
Within the Advanced tab make sure that the settings are configured as shown in the picture below:
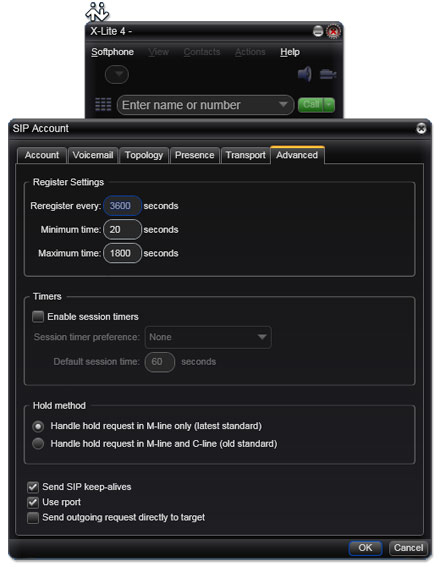
Once setup as above click the OK button.
|
STEP 6
|
You will now be back at the SIP accounts screen. Close this screen so that you may return to X-Lite's main interface. The X-Lite software will now attempt to register (login) to our servers. You should see this happen in a few seconds and if successful you will see a screen like this:
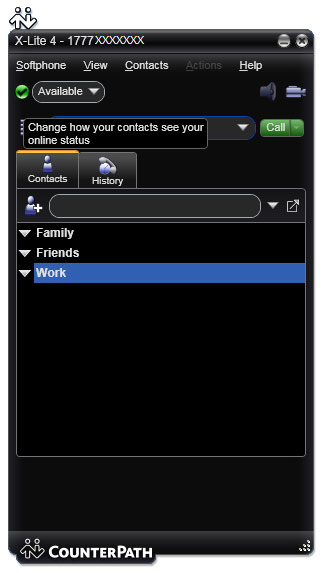
If you receive an error message, please verify that your internet connection is working on the computer, and re-verify the settings.
|
STEP 7
|
That's it! You can now make a phone call.
You can make a test call to 17771234567, or if you are signed up for one of Callcentric's rate plans you
can place a call to a traditional landline or mobile phone by dialing either:
1 + the area code and number for calls to the US
Or
011 + the country code, area code, and number for calls worldwide
(you may also use 00 instead of 011).
|
